
- Quick Start Guide for Gen1 S1070/S1080/S1090
- Pairing with the ASAHOM App
- Cutting & Reconnecting for Gen1 Waterproof Junction Box
- LED number setting for Gen1 Controller
- Cutting & Reconnecting for Gen 2 Waterproof Junction Box
- Quick Start Guide for Gen2 S1070/S1080/S2080
- Layout Setting for Gen2 Controller
- How to connect to Ethernet (Gen 2 S1080 S2080 only)
- Power extension cord
- Gen 1 T-splitter
- Power-T Connector
- Wire Clip / Screw Pack
- End Cap
- Gen 1 Waterproof Junction Box
- Wall-Mount Enclosure Kit
- Track-Mount Kit
- Gen 1 Light string extension cord
- Gen 1 Controller
- Fault Detection Module
- Gen 2 T-Splitter
- Gen 2 Waterproof Junction Box
- Gen 2 Light string extension cord
- Gen 2 Controller
- Dual Output vs. Single Output: Unlock Greater Flexibility for Your Permanent Outdoor Lights
- Why ASAHOM Permanent Outdoor Light Installations Over 200ft Need Extra Power Injection?
- The Simple, Secure Seal: Why ASAHOM's Waterproof Connectors Are a Game-Changer
- Unleash Your Creativity: How ASAHOM's Palette & Effect Combo Redefines Smart Lighting
- Why Your Outdoor Lights Stay Connected: The Truth About WiFi & Why ASAHOM Uses 2.4GHz
- Beyond Simple Splitting: How the ASAHOM T-Splitter Redefines Smart Lighting Control
- Redefine Your Night: The Power of Zone Control with ASAHOM
Quick Start Guide for Gen2 S1070/S1080/S2080
Step 1 - Test Before installation
Step 2 - Install the Mounting Base
Step 3 - Mount the Lights to the Eaves
Please carefully watch the quick start guide video, especially Step 2
Important Reminder
Before proceeding to Step 2, please be sure to inspect the installation site at your home to confirm the locations of the power supply and controller, determine the orientation of the male and female connectors on the light string, and then confirm the mounting direction of the base so that the angled surface faces the wall.
Step 1 - Test Before installation
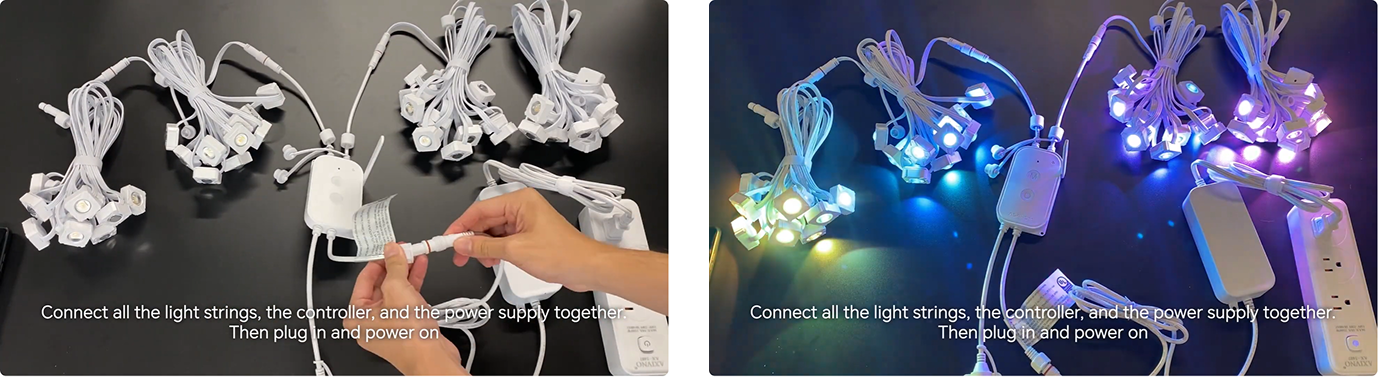

What to do:
- Connect all string light sections in sequence
- Plug in the power adapter
- Check that all lights are working properly
Ensure all lights are connected before powering on. Otherwise, the lights may not illuminate.
If some lights do not turn on, try setting layout detect in the App first.
If your setup includes more than 144 LEDs, please refer to the Power Injection T-Connector section for proper connection guidelines.
Step 2 - Install the Mounting Base
Please note: due to the unique design of the mounting base, it can easily be installed in the wrong orientation, so be sure to pay close attention to this step.
What to do
1. Confirm the final relative positions of the controller and the light strings. Determine the installation direction of the light strings, and make sure the controller’s male connector is positioned next to the light string’s female connector.
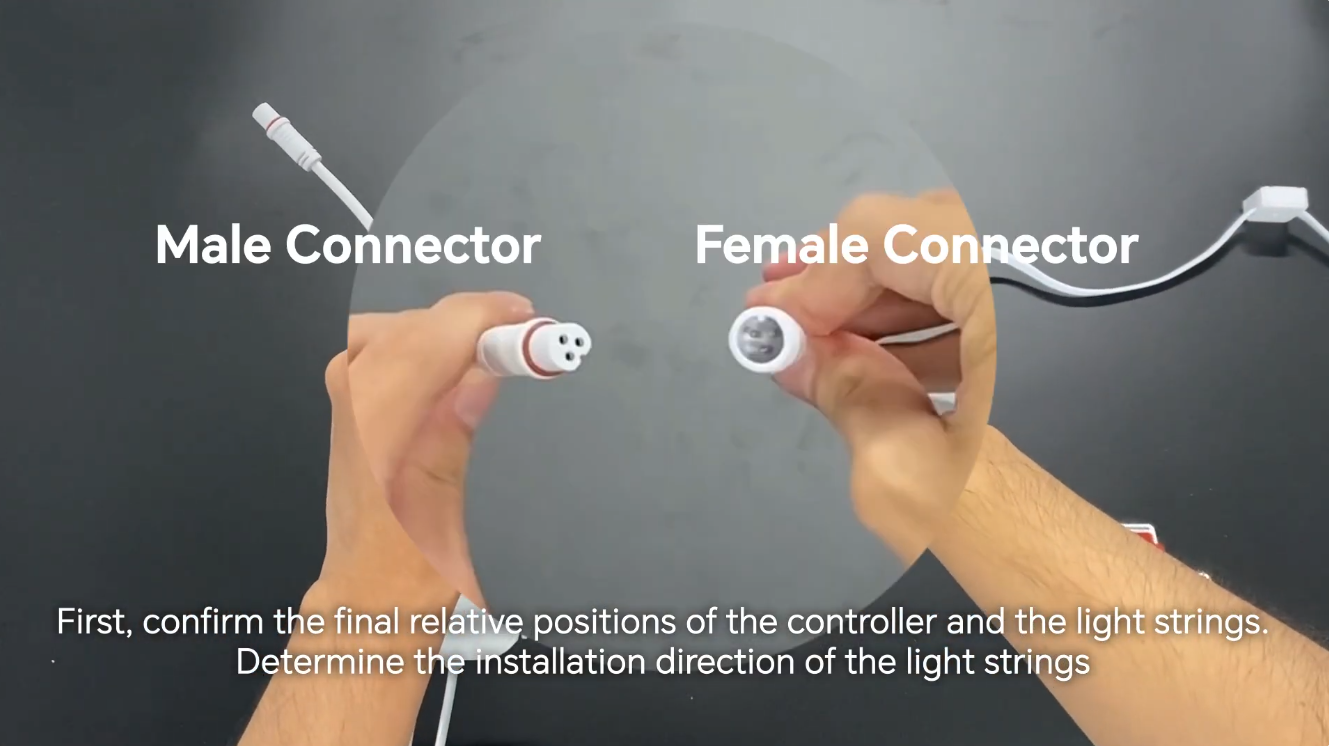
For this step, please do an on-site walkthrough of your home.
2. Clip the mounting base onto the light from the side
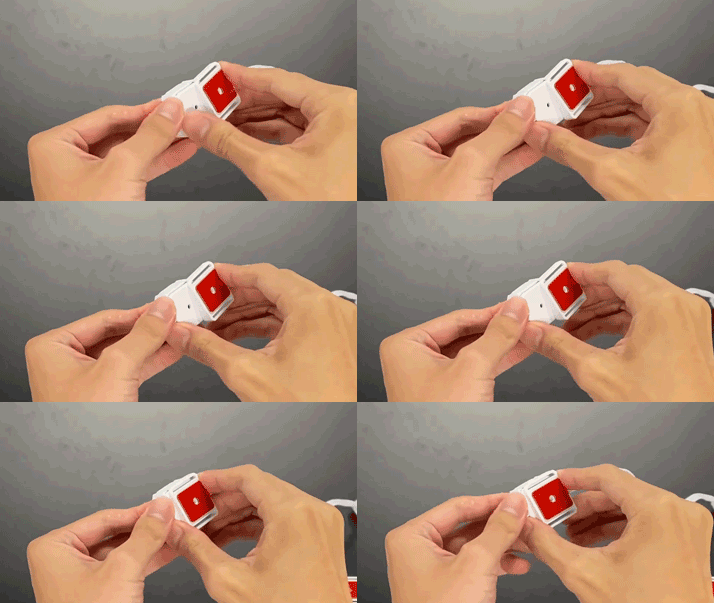
Make sure the angled surface ends up facing your house wall. Then install the remaining mounting bases.
Step 3 - Mount the Lights to the Eaves
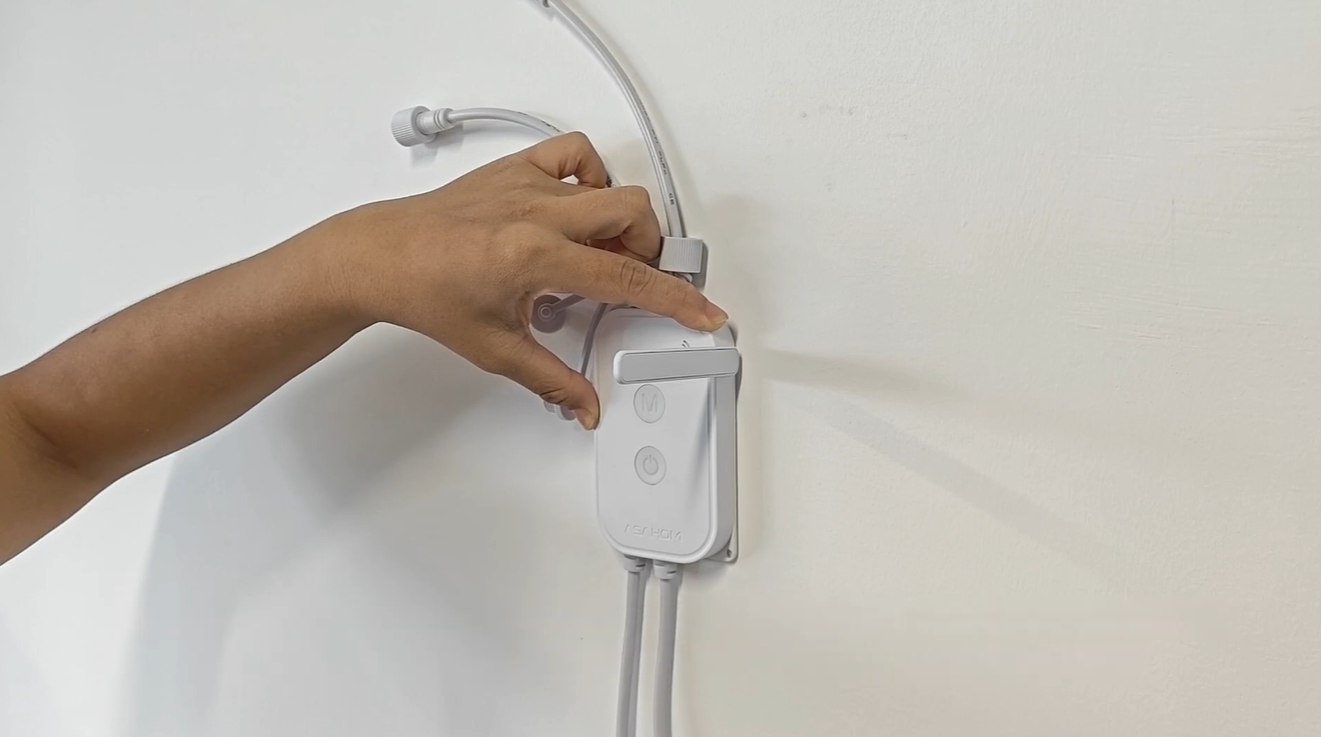
1. Confirm where the controller will be placed. Bend the antenna to a 90° angle and make sure there are no obstructions around it.
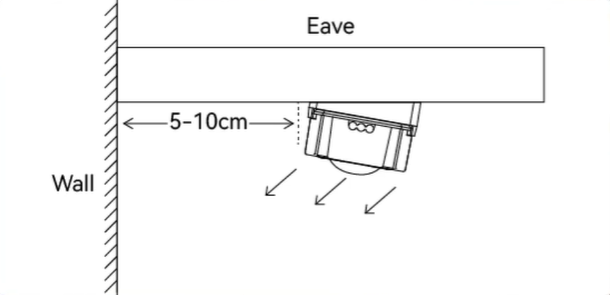
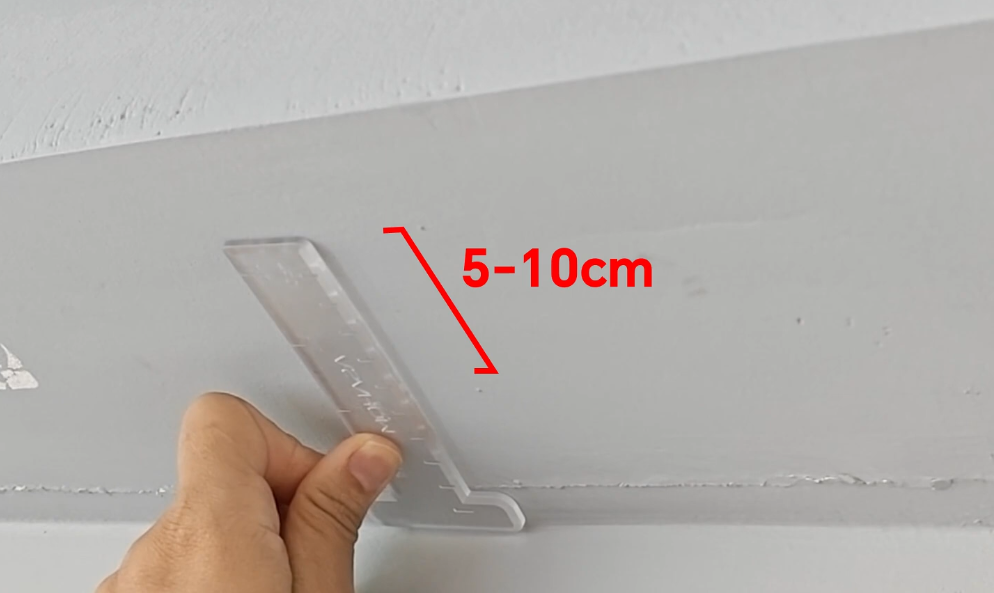
2.Use the included mounting ruler to measure under the eaves. The ideal mounting distance is 5–10 cm from the wall
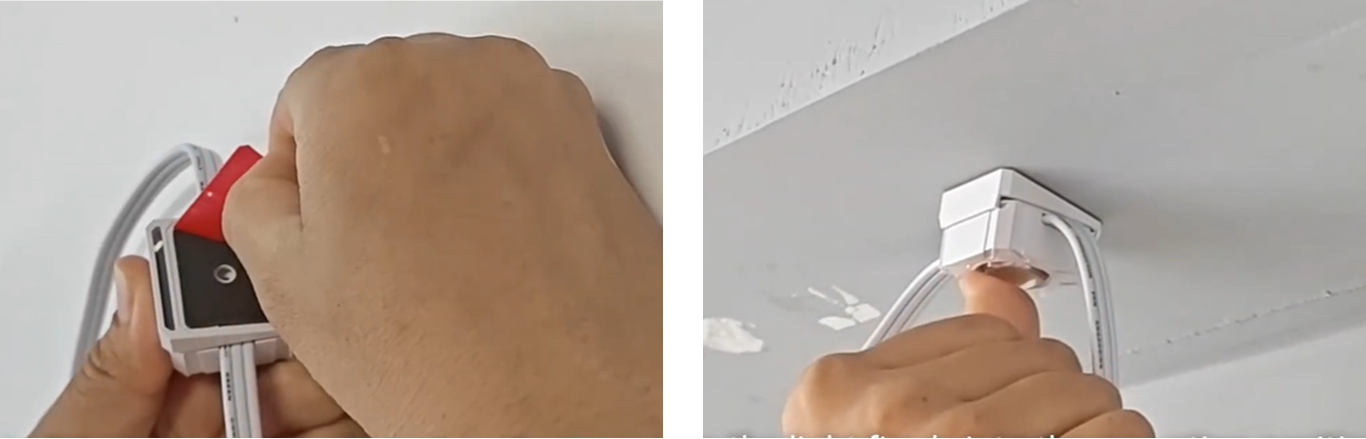
3. Peel off the backing from the adhesive. Press the light firmly into the mounting position for about 5–8 seconds to make sure the 3M adhesive sticks securely
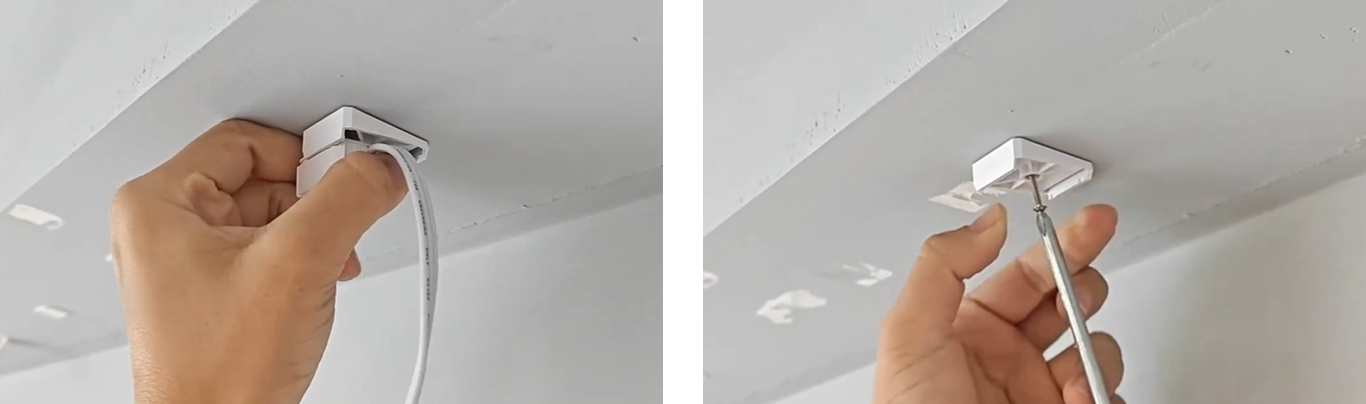
4. Next is an optional step. If you want a more stable, long-term installation, you can remove the light from the mounting base and drive the included screw into the center screw hole to secure it permanently.
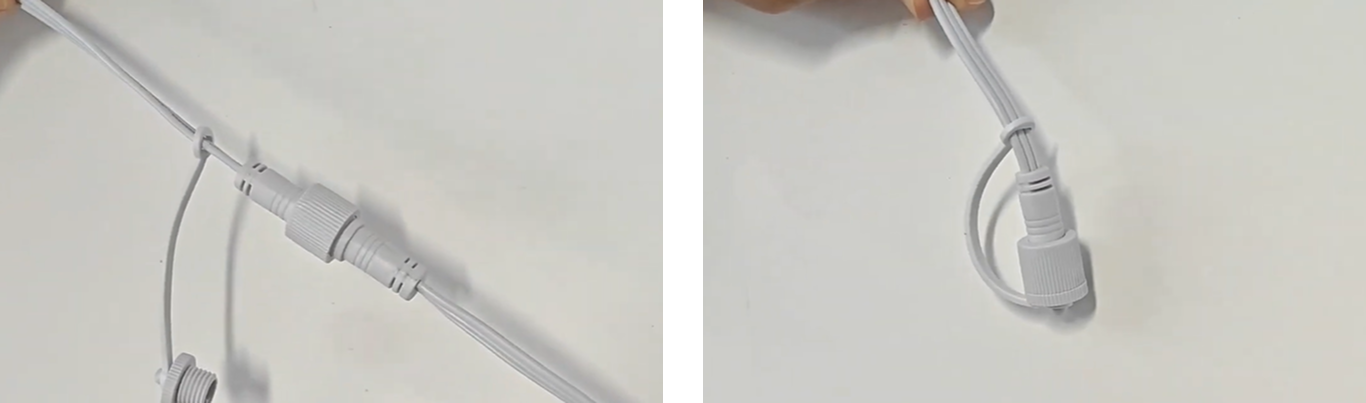
5. When you finish installing one light string and connect it to the next, plug the connector in firmly and tighten the waterproof ring. Once all the light strings are installed, use the end cap to seal the end of the final light string.
FAQs
A1: Why doesn't the string light up after plugging in?
Q1: Each light string section must be connected before plugging in, otherwise it may not light up.
A2: Why does the string light fall off during installation?
Q2: Clean the wall surface with a dry cloth or alcohol wipe before installation;
In addition to adhesive, it's recommended to secure with screw clips, especially at corners and connectors.
A3: What if lights do not respond after installation?
Q3: First check if all connectors are tightened correctly and waterproof sealed;
Try unplugging and plugging back power. When the control box’s blue light blinks, reconfigure Wi‑Fi pairing.
Updated on 29 Sep 2026
What are your Feelings?
Thanks for your feedback
- Choosing a selection results in a full page refresh.
- Opens in a new window.