
- Quick Start Guide for Gen1 S1070/S1080/S1090
- Pairing with the ASAHOM App
- Cutting & Reconnecting for Gen1 Waterproof Junction Box
- LED number setting for Gen1 Controller
- Cutting & Reconnecting for Gen 2 Waterproof Junction Box
- Quick Start Guide for Gen2 S1070/S1080/S2080
- Layout Setting for Gen2 Controller
- How to connect to Ethernet (Gen 2 S1080 S2080 only)
- Power extension cord
- Gen 1 T-splitter
- Power-T Connector
- Wire Clip / Screw Pack
- End Cap
- Gen 1 Waterproof Junction Box
- Wall-Mount Enclosure Kit
- Track-Mount Kit
- Gen 1 Light string extension cord
- Gen 1 Controller
- Fault Detection Module
- Gen 2 T-Splitter
- Gen 2 Waterproof Junction Box
- Gen 2 Light string extension cord
- Gen 2 Controller
- Dual Output vs. Single Output: Unlock Greater Flexibility for Your Permanent Outdoor Lights
- Why ASAHOM Permanent Outdoor Light Installations Over 200ft Need Extra Power Injection?
- The Simple, Secure Seal: Why ASAHOM's Waterproof Connectors Are a Game-Changer
- Unleash Your Creativity: How ASAHOM's Palette & Effect Combo Redefines Smart Lighting
- Why Your Outdoor Lights Stay Connected: The Truth About WiFi & Why ASAHOM Uses 2.4GHz
- Beyond Simple Splitting: How the ASAHOM T-Splitter Redefines Smart Lighting Control
- Redefine Your Night: The Power of Zone Control with ASAHOM
Gen 2 Waterproof Junction Box
The Gen 2 Waterproof Junction Box is designed to protect and seal wiring connections after cutting or extending the light strings. It ensures a waterproof and durable connection for outdoor installations.
The all-new Gen 2 waterproof junction box dramatically streamlines the cut-and-connect process, making it the fastest cut-and-connect accessory for permanent lights on the market
Appearance

How to Use
Before Installation:
Ensure the power is completely disconnected before cutting or wiring.
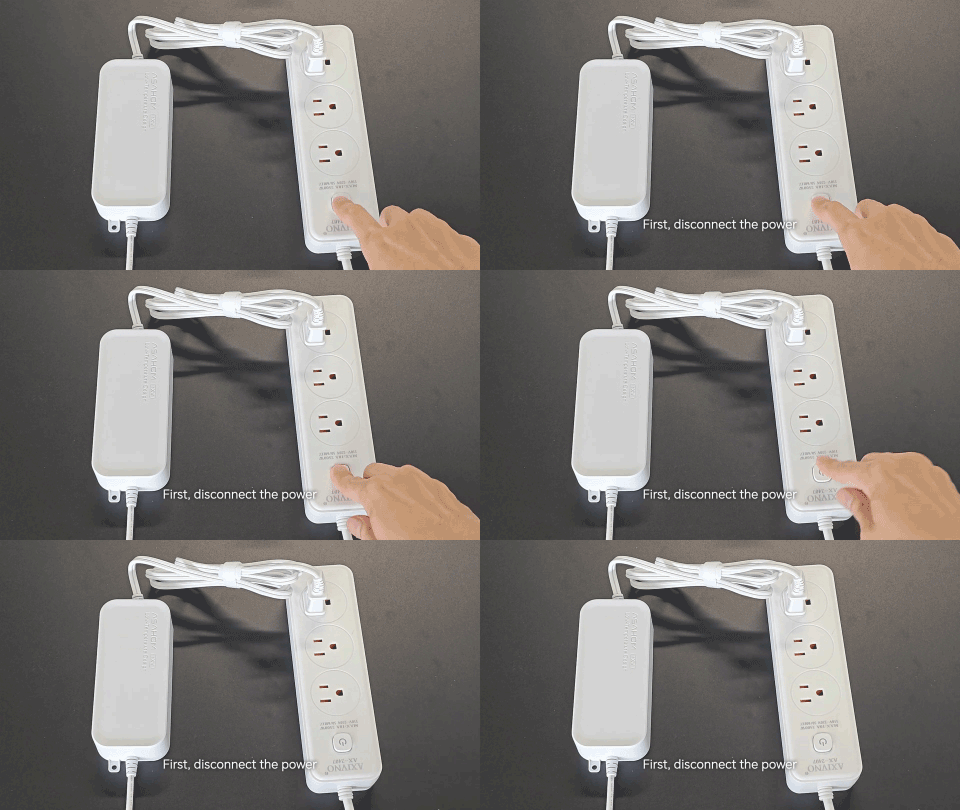
How to Use:
Step 1 – Cut the Light String Cut the string lights at the desired position
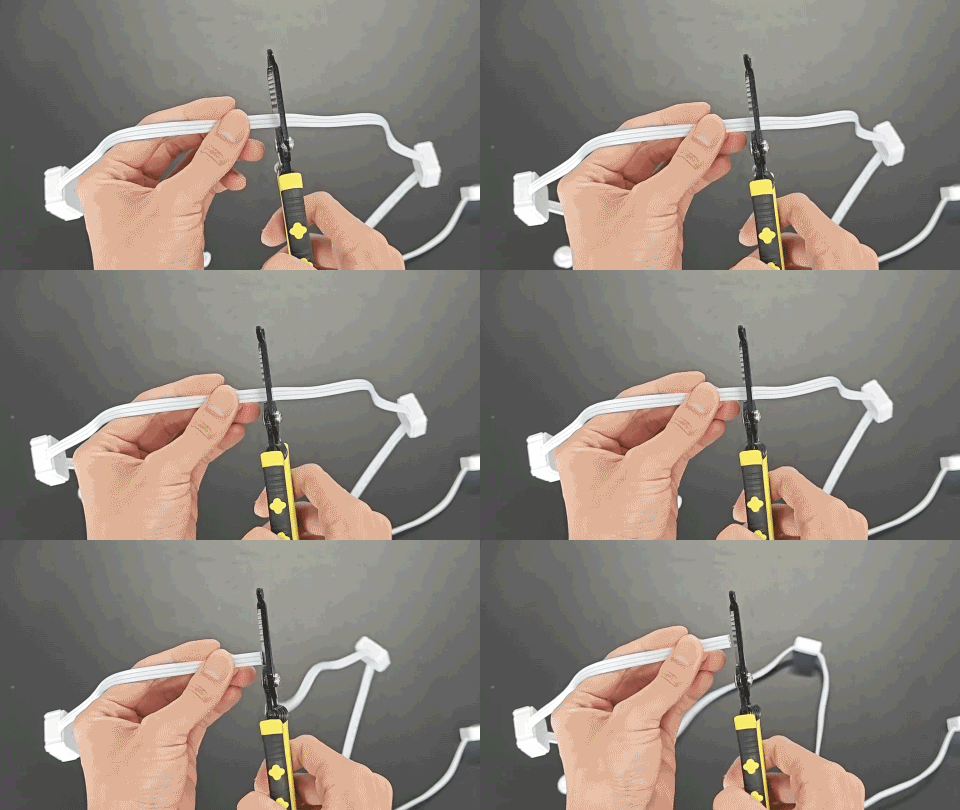
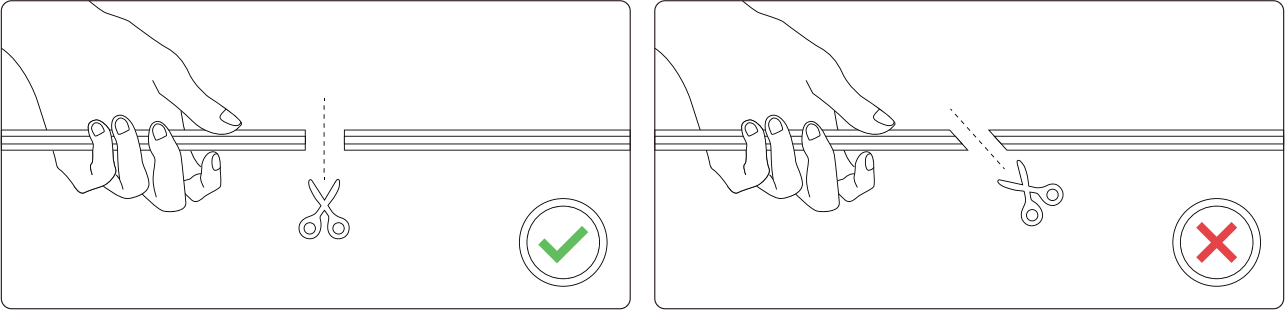
Please be sure not to cut at an angle, as shown in the illustration.
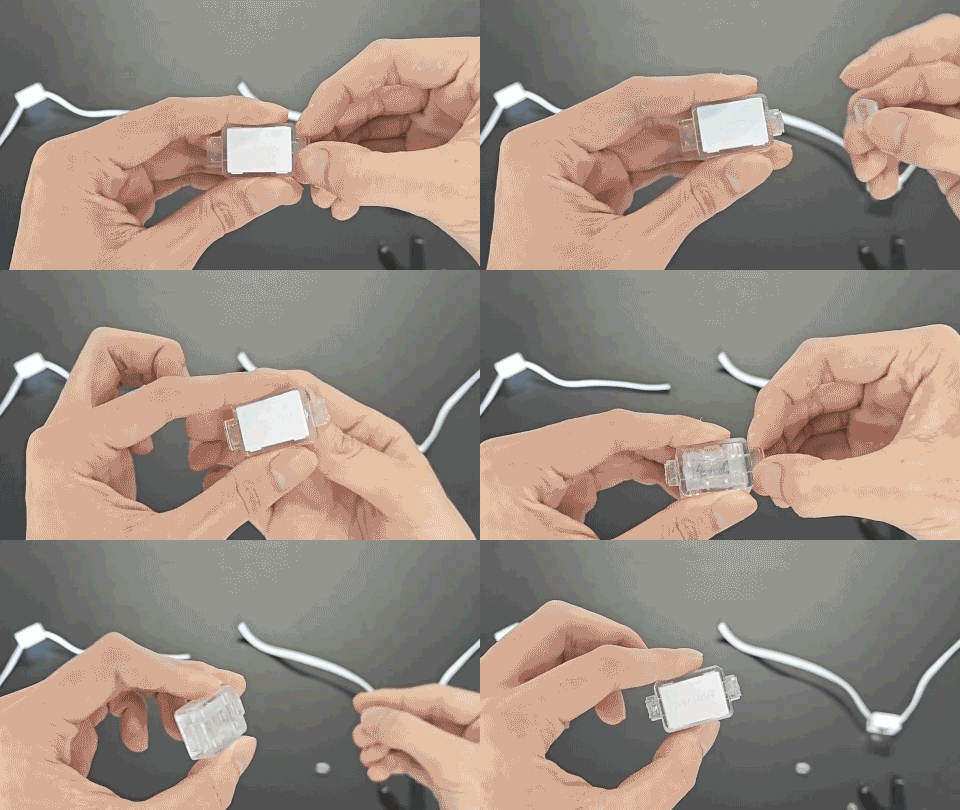
Step 2 – Take out the waterproof junction box and remove the caps from both sides
Step 3 – Insert the wires you need to splice into the box
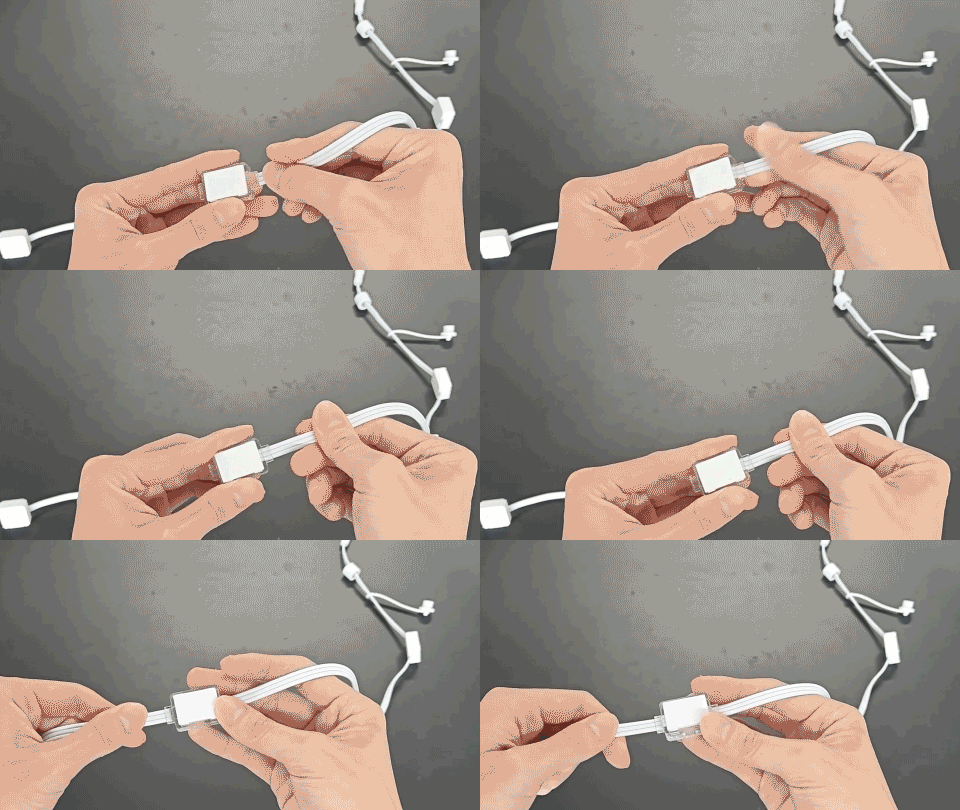
Note: There are two important things to keep in mind here.
① make sure the positive, negative, and signal wires match up one-to-one. You can check whether the wiring is correct by verifying that the pattern on the wire stays continuous.
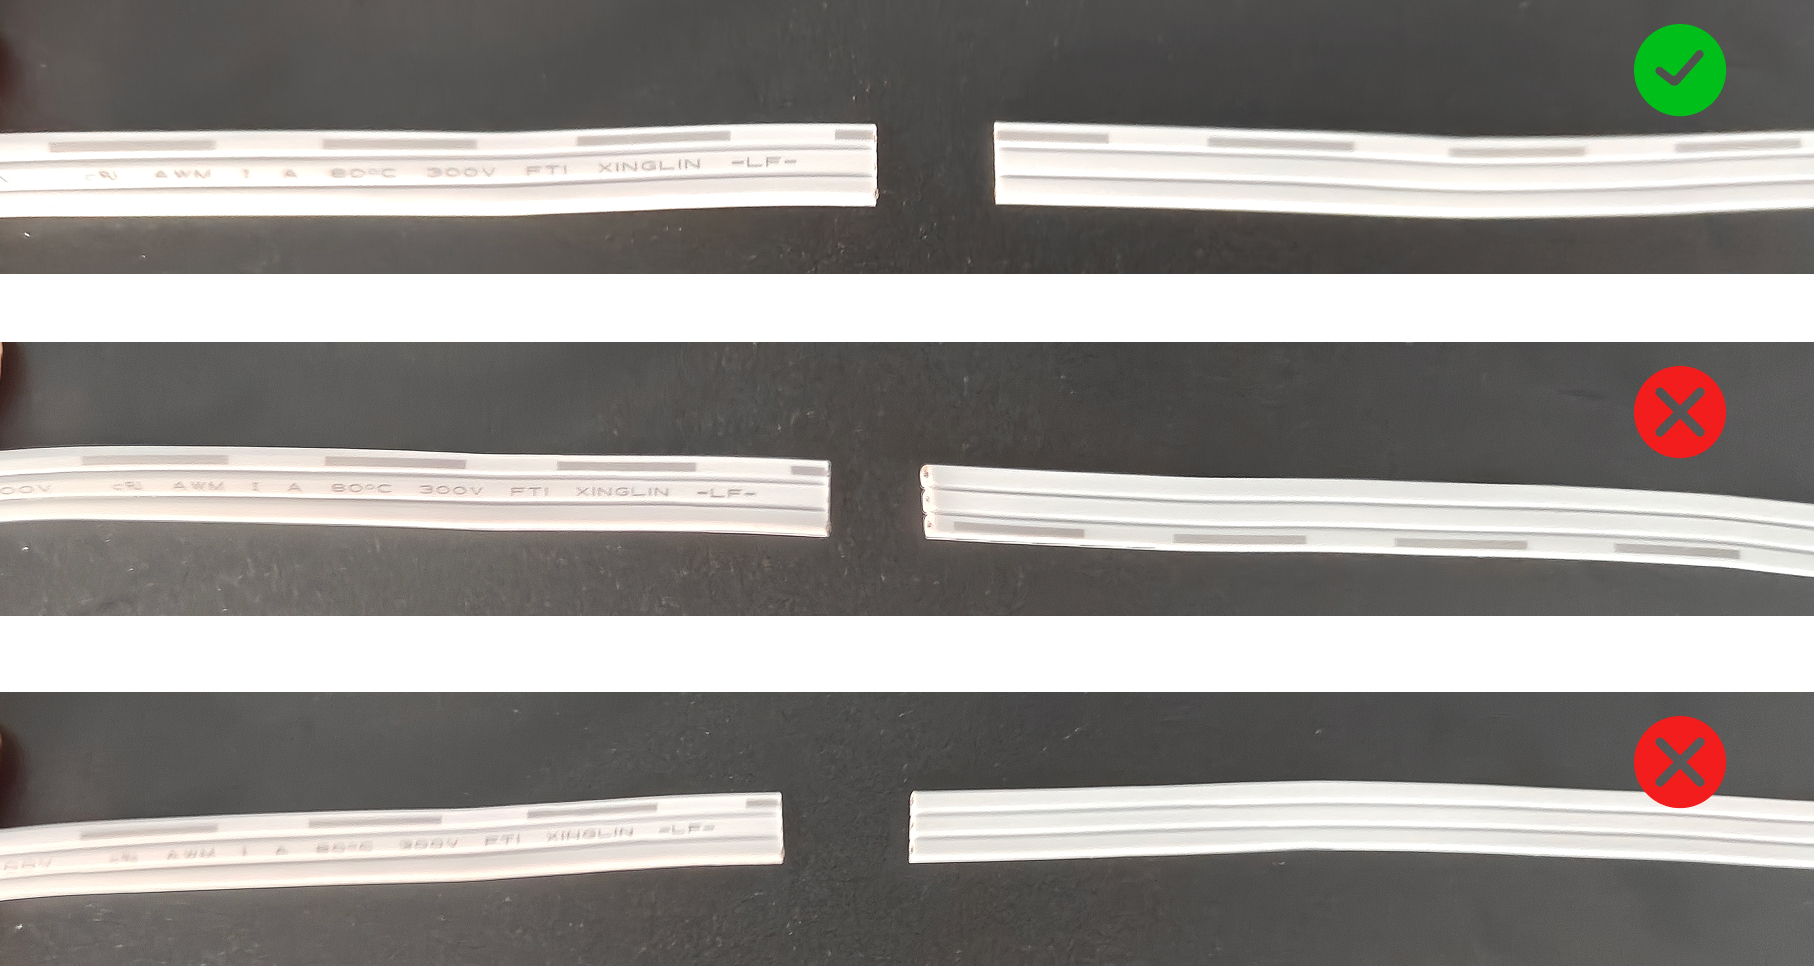
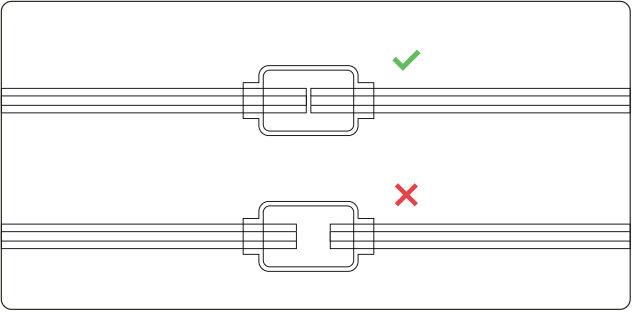
② The wires must be inserted all the way in. Please refer to the illustration for the correct and incorrect examples.
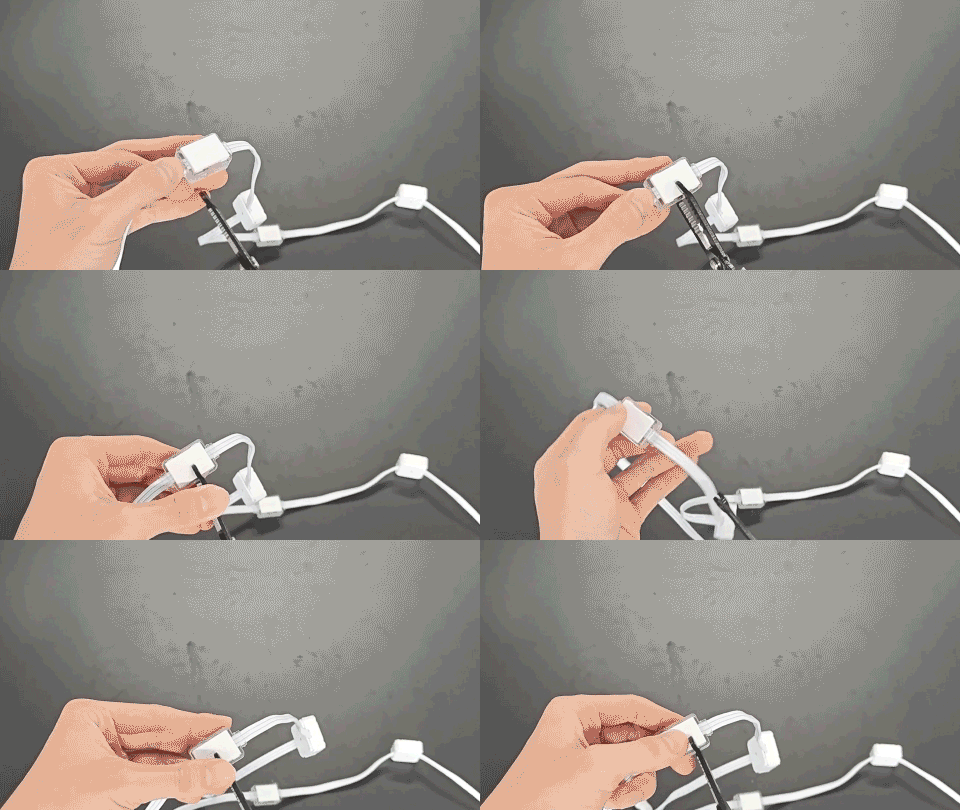
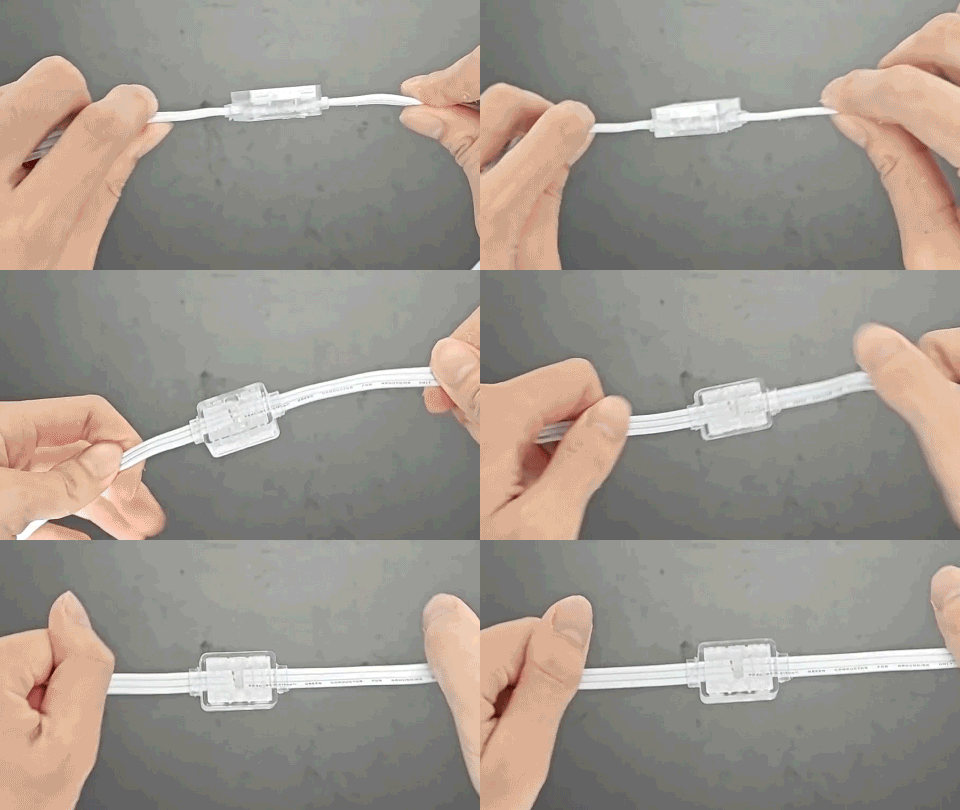
Step 4 – Use pliers or your fingers to firmly press the top cover of the box shut until it sits flat
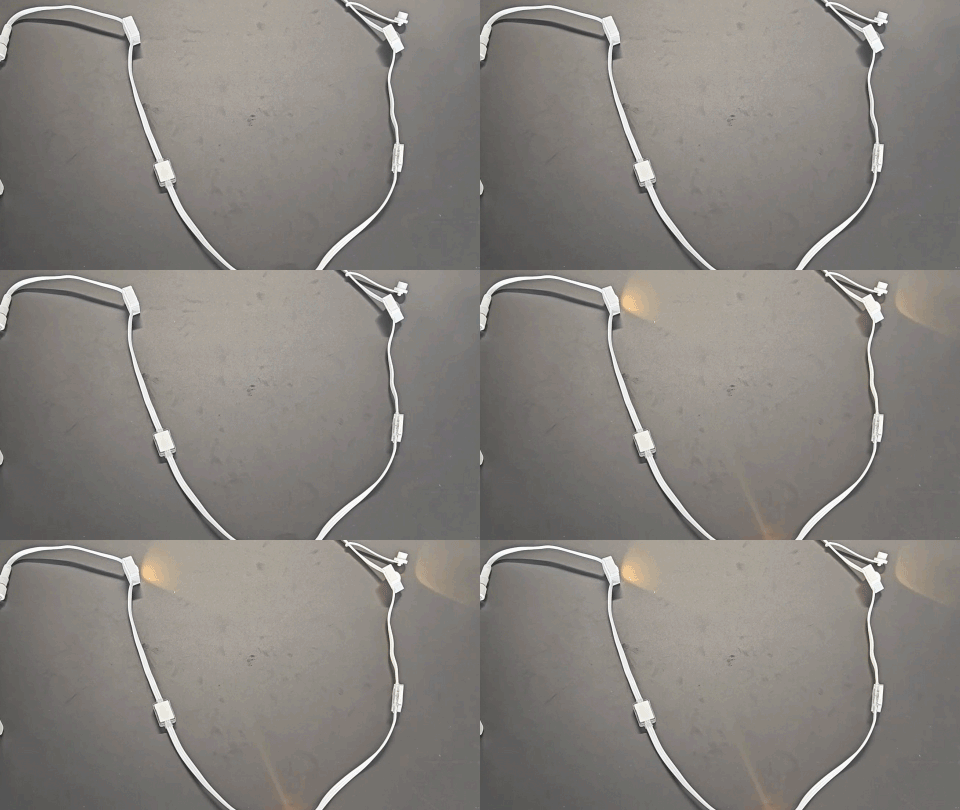
Step 5 – Power on and verify that the connection is successful
Tips
-
For optimal waterproofing, this item is single-use. Once the clip is snapped closed, it cannot be reversed. Please watch the tutorial video carefully before use.
-
This accessory is only compatible with ASAHOM brand products and is not compatible with other brands.
FAQs
Q1: Can the Waterproof Junction Box be reused?
A1: No. It is designed for single use only.
Q2: How do I open the top cover once it has been snapped shut?
A2: It cannot be opened once snapped shut. Therefore, before performing the final step, please make sure the wires are fully inserted and that the positive and negative poles are correctly matched.
Q3: What if lights after the junction box don’t work?
A3: Check if:
Whether the positive and negative poles are correctly matched
Whether the wires are fully inserted
Whether the top cover is fully closed
Try running light detection in the app
Q4: Can I cut the lights while powered on?
A4: Technically yes, but for your safety, we strongly recommend turning off the power before cutting.
Updated on 30 Sep 2026
What are your Feelings?
Thanks for your feedback
- Choosing a selection results in a full page refresh.
- Opens in a new window.