For advanced users or those who want more control, ASAHOM Permanent Outdoor Lights offer high-level customization options. These include zoning control and light sequencing, allowing you to divide the light strip into segments and define how each section behaves. Whether you're designing complex displays or fine-tuning performance, these tools let you push the limits of what your lighting can do.
How to Enable Advanced Features?
Want to explore more powerful lighting controls? Follow these simple steps to unlock ASAHOM’s advanced features:
 |
1. Open Device Settings:On the device control page, tap the settings icon in the top right corner to enter the Device Setting page.
2. Enable Advanced Features:Find the Advanced Features option and tap the toggle to turn it on. Tip: Don’t forget to read the reminder message below before proceeding.
3. Access New Controls:Once enabled, a new Sequence Setting section will appear under the Product Setting area in Device Settings. At the same time, a Zone option will be added to the main control page, giving you access to powerful zone control and custom light sequencing.
Now you're ready to take full control and make your lighting setup truly your own!
|
Sequence Setting
The Sequence Setting feature gives users even greater control over how lighting effects are displayed. Based on the actual installation layout — such as the direction of OUT1 and OUT2 light strip outputs — you can easily adjust the playback order of the effects. This ensures that the lighting flow perfectly matches your space, delivering a more personalized and visually coherent experience.
 |
1. On the device main screen, tap the Device Setting icon in the top right corner;
2. Select Sequence Setting from the list;
3. Tap the desired sequence option;
4. Tap Save to apply the setting. |
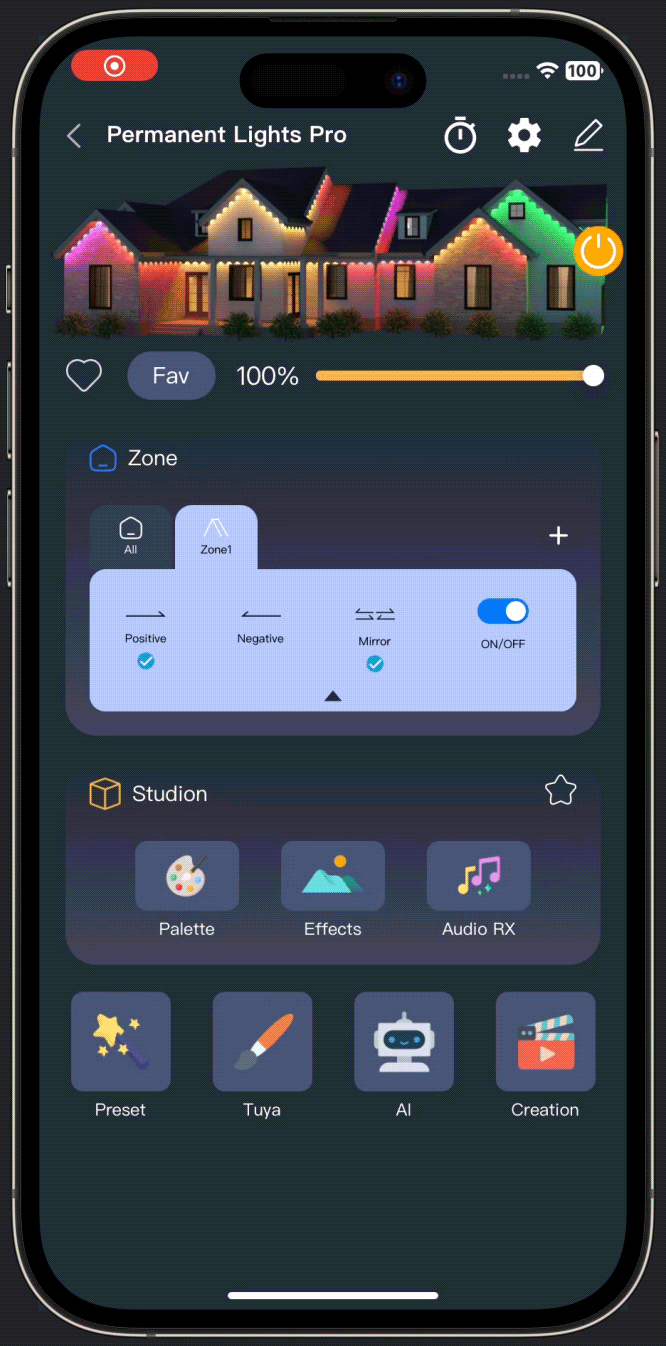
Zone Control
Zone Control is a powerful advanced feature of ASAHOM Permanent Outdoor Lights, allowing you to divide a single light strip into up to four independent zones. Each zone can be controlled separately — with different lighting effects, colors, or modes — to suit the unique needs of various areas.
It’s like turning one light strip into four individual ones, all working independently without interfering with each other. Whether you want a festive vibe on your porch, calm ambient lighting along a fence, or something playful in the garden — Zone Control gives you the flexibility to light up every corner your way.
ASAHOM’s Zone Control feature gives you flexible, fine-grained control over your lighting setup.
Here are the key highlights:
1. Up to 4 Independent Zones
You can create up to four separate zones, each functioning as an independent section of your light strip.
2. User-Defined Zones Are Mutually Exclusive with ALL Zone
Custom zones operate separately from the default “All Zone” mode. When you switch to Custom zones, the default “All Zone” is freeze. However, all user-created zones can work together simultaneously, allowing for complex and coordinated multi-zone lighting effects.
3. Individual Zone Settings
Each custom zone supports its own direction, mirror, and on/off settings, enabling full control over how each segment behaves.
How to Create a New Zone?
Creating a new lighting zone is simple and intuitive. Just follow these steps:
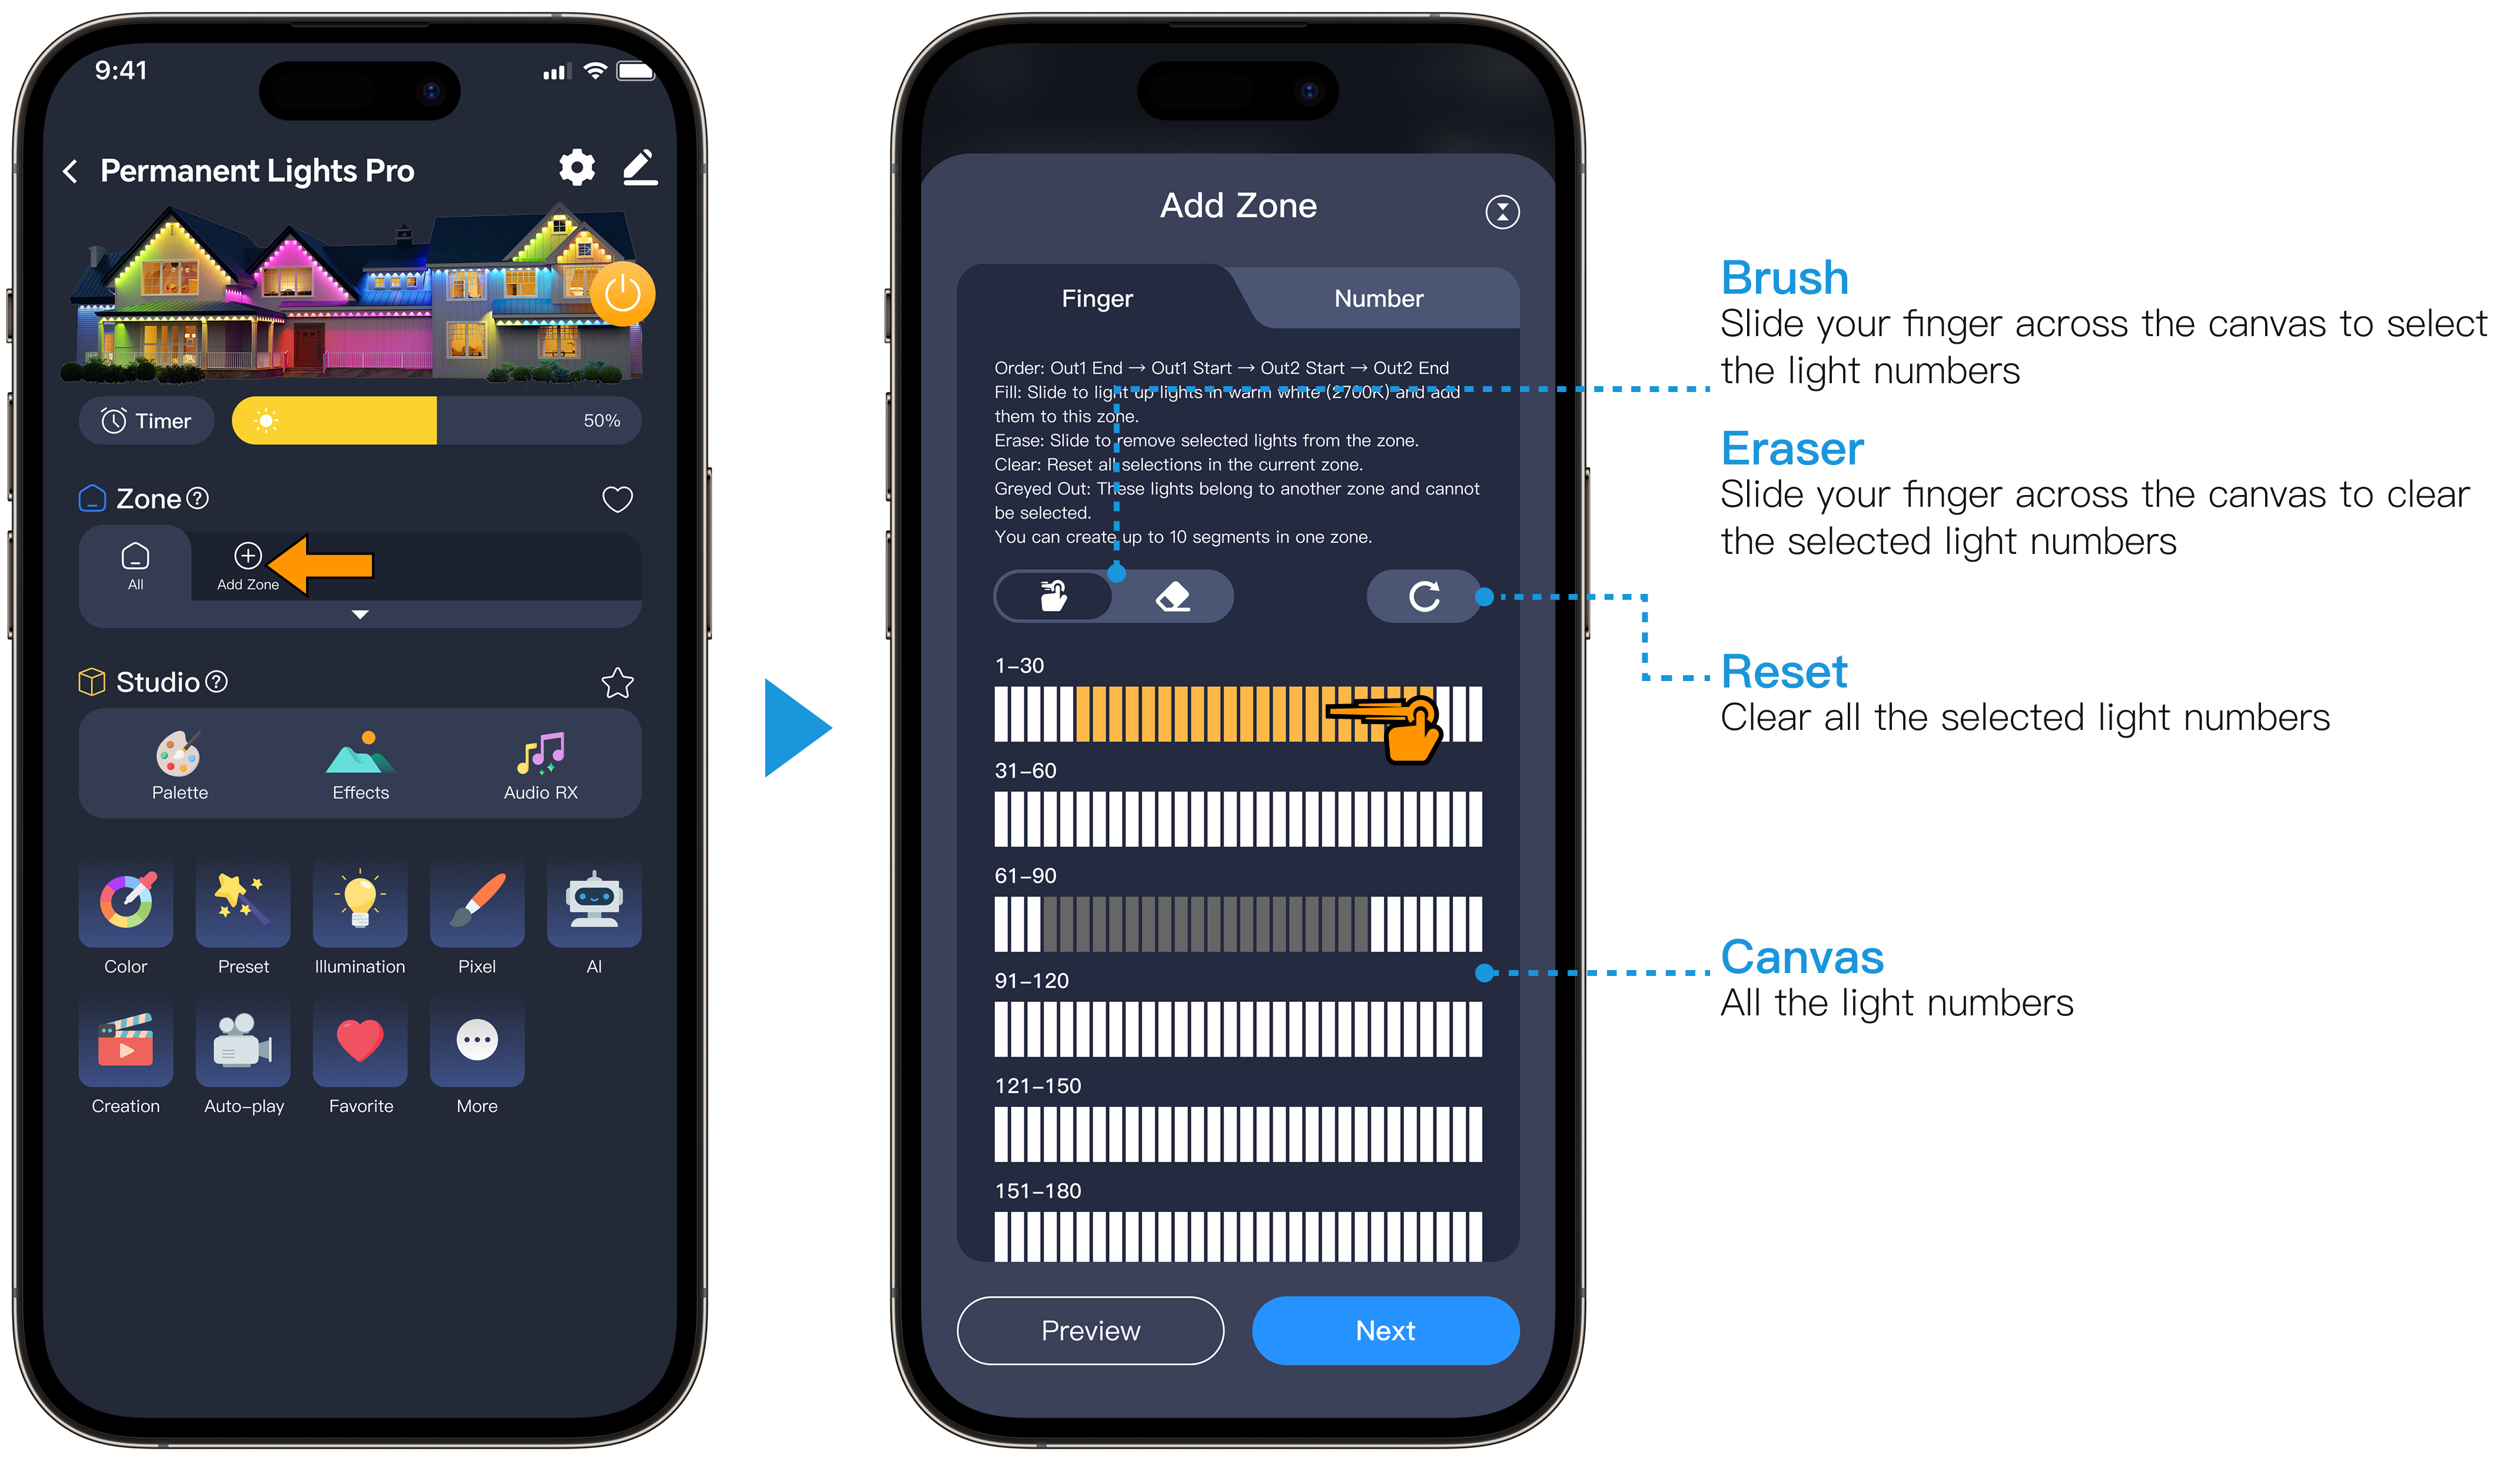
Finger Mode
Select Brush mode, then swipe your finger across the canvas to choose the lights you want. Selected lights will be highlighted in warm white.
Tap the Preview button to see which lights illuminate in real life—this lets you confirm that you’ve selected the correct ones.
You can switch to Eraser mode and swipe on the canvas to deselect any unwanted lights, or use the Reset button to clear all selections.
Lights that have already been assigned to another zone cannot be selected again; they will appear grayed out.
Once you’ve finished making your selections, tap Confirm to proceed to the next step and save this zone.
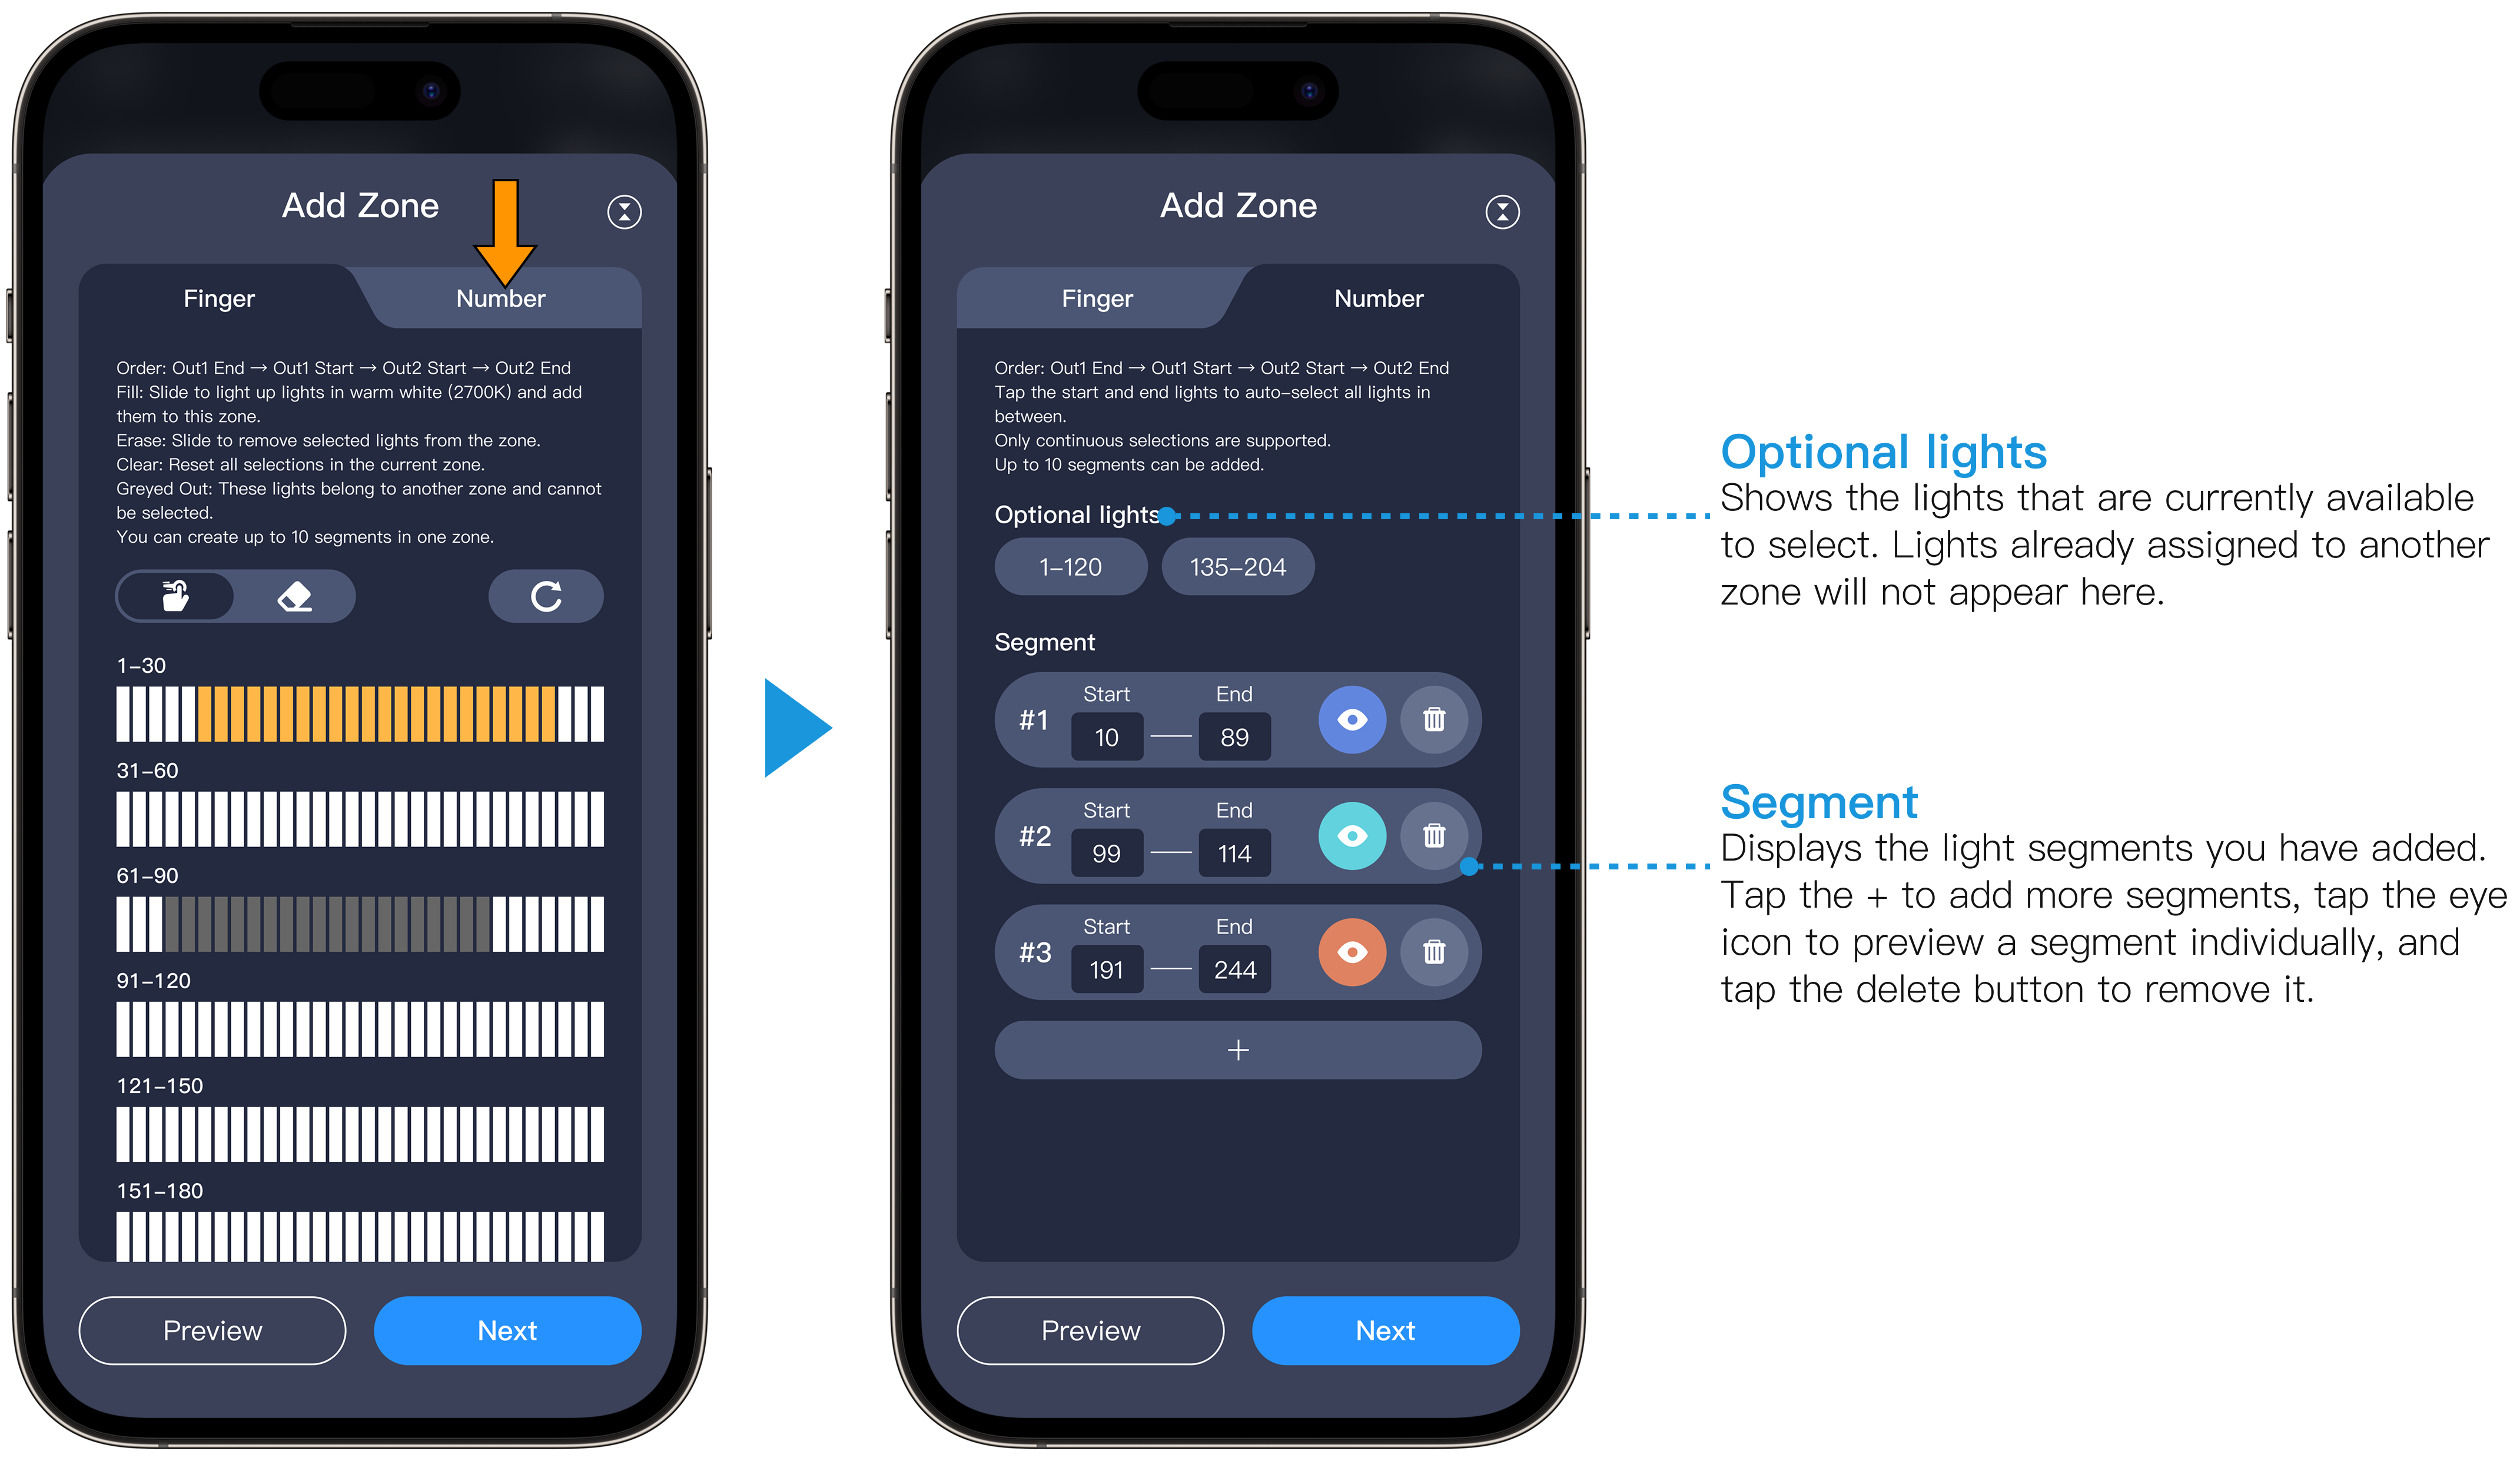
Number Mode
1. Add Segment
When adding a segment, you need to define its start and end position:
a. Start LED values must be ≥ 1 (not 0);
b. After setting the Start LED and End LED, a locator icon will appear on the right side of the segment;
c. Tap this icon to illuminate the selected segment on the light strip — a very handy way to visually confirm the segment’s position;
d. Important Note: When adding multiple segments, segments must not overlap — the End LED of one segment should not be equal to or exceed the Start LED of the next segment.
2.Save and Apply
Once you're done, tap Save. Your new zone will immediately appear in the Zone section, and the corresponding lights will begin displaying effects within that specific area.
How to Edit or Delete an Existing Zone?