
- Quick Start Guide for Gen1 S1070/S1080/S1090
- Pairing with the ASAHOM App
- Cutting & Reconnecting for Gen1 Waterproof Junction Box
- LED number setting for Gen1 Controller
- Cutting & Reconnecting for Gen 2 Waterproof Junction Box
- Quick Start Guide for Gen2 S1070/S1080/S2080
- Layout Setting for Gen2 Controller
- How to connect to Ethernet (Gen 2 S1080 S2080 only)
- Power extension cord
- Gen 1 T-splitter
- Power-T Connector
- Wire Clip / Screw Pack
- End Cap
- Gen 1 Waterproof Junction Box
- Wall-Mount Enclosure Kit
- Track-Mount Kit
- Gen 1 Light string extension cord
- Gen 1 Controller
- Fault Detection Module
- Gen 2 T-Splitter
- Gen 2 Waterproof Junction Box
- Gen 2 Light string extension cord
- Gen 2 Controller
- Dual Output vs. Single Output: Unlock Greater Flexibility for Your Permanent Outdoor Lights
- Why ASAHOM Permanent Outdoor Light Installations Over 200ft Need Extra Power Injection?
- The Simple, Secure Seal: Why ASAHOM's Waterproof Connectors Are a Game-Changer
- Unleash Your Creativity: How ASAHOM's Palette & Effect Combo Redefines Smart Lighting
- Why Your Outdoor Lights Stay Connected: The Truth About WiFi & Why ASAHOM Uses 2.4GHz
- Beyond Simple Splitting: How the ASAHOM T-Splitter Redefines Smart Lighting Control
- Redefine Your Night: The Power of Zone Control with ASAHOM
Gen 1 Waterproof Junction Box
Important Update:
This tutorial only applies to the Gen 1 ASAHOM waterproof junction box. ASAHOM has now released a more convenient Gen 2 waterproof junction box. If your waterproof junction box accessory is not the product mentioned below, please refer to the latest cutting tutorial:
This tutorial only applies to the Gen 1 ASAHOM waterproof junction box. ASAHOM has now released a more convenient Gen 2 waterproof junction box. If your waterproof junction box accessory is not the product mentioned below, please refer to the latest cutting tutorial:
The Waterproof Junction Box is designed to protect and seal wiring connections after cutting or extending the light strings. It ensures a waterproof and durable connection for outdoor installations.
When to Use
-
When you reconnect two sections of a light string after cutting.
-
When extending or modifying the wiring outdoors.
Before Installation
-
Ensure the power is completely disconnected before cutting or wiring.
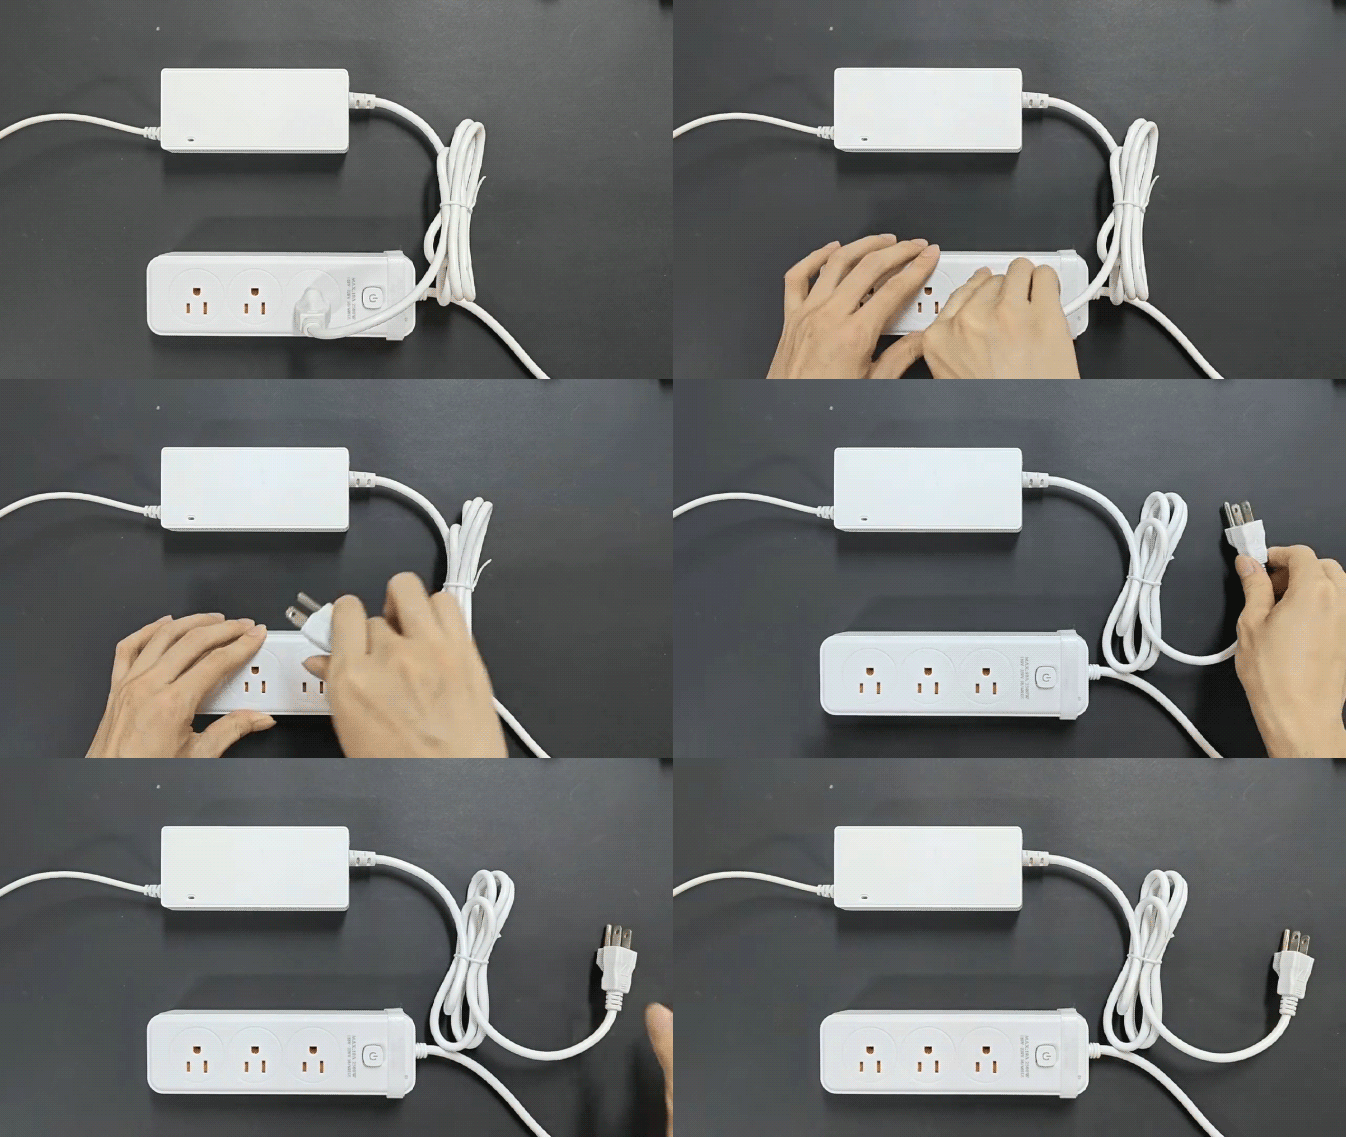
How to Install
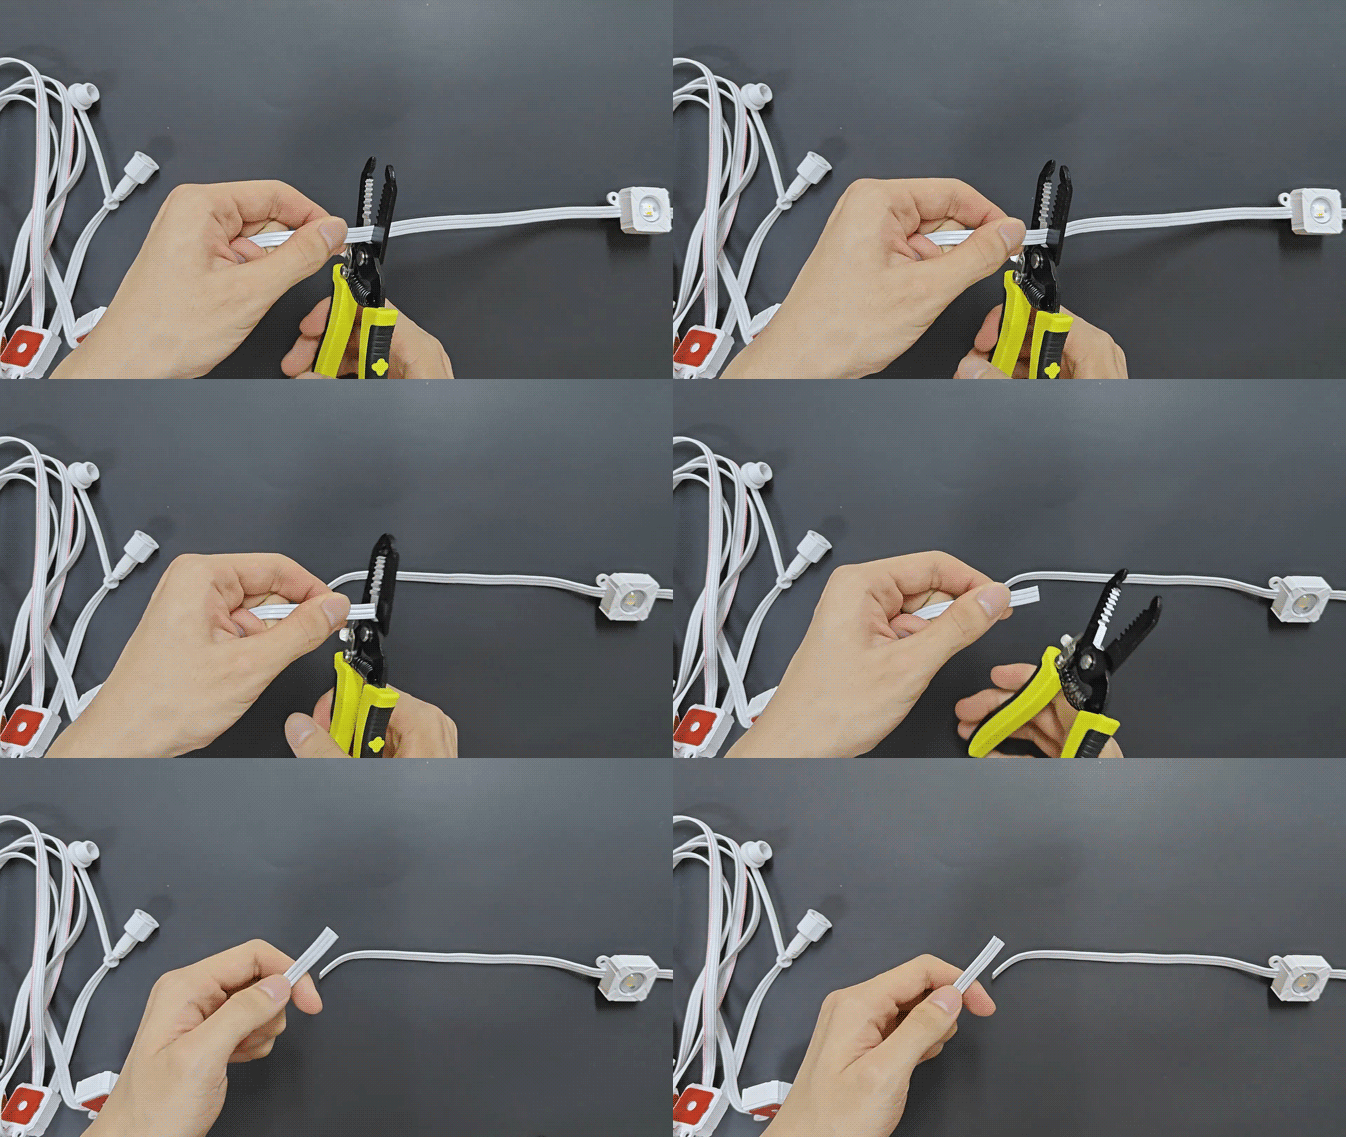
Step 1 – Cut the Light String Cut the string lights to the desired position.
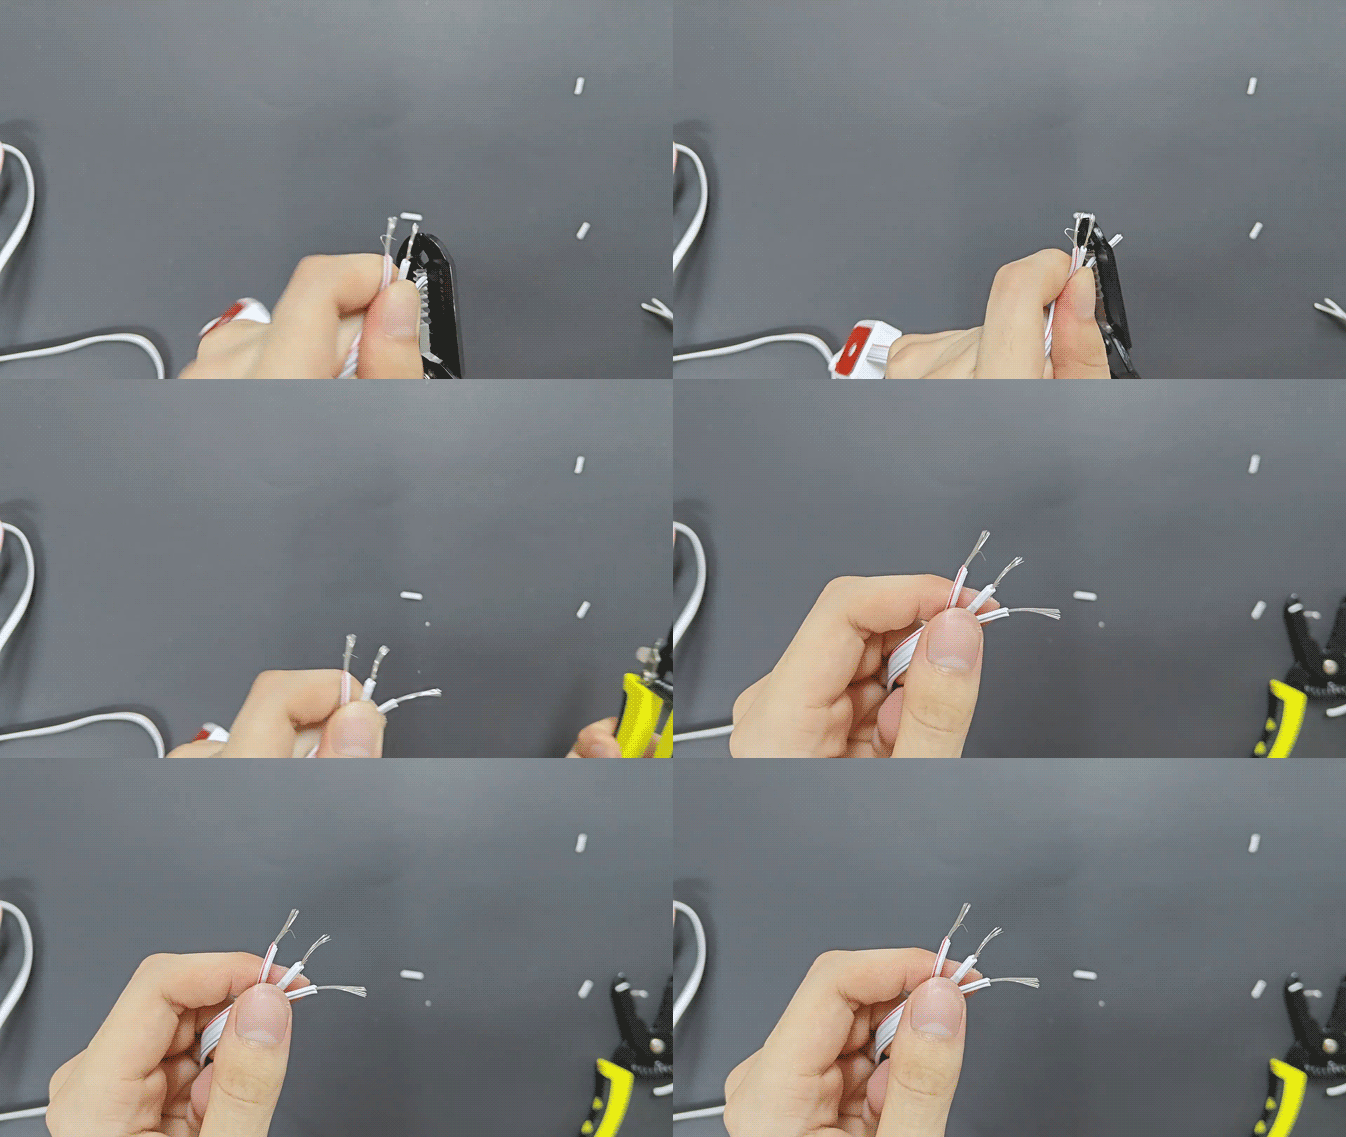
Step 2 – Strip the Wires Use a wire stripper to remove 1cm of insulation from each wire end.
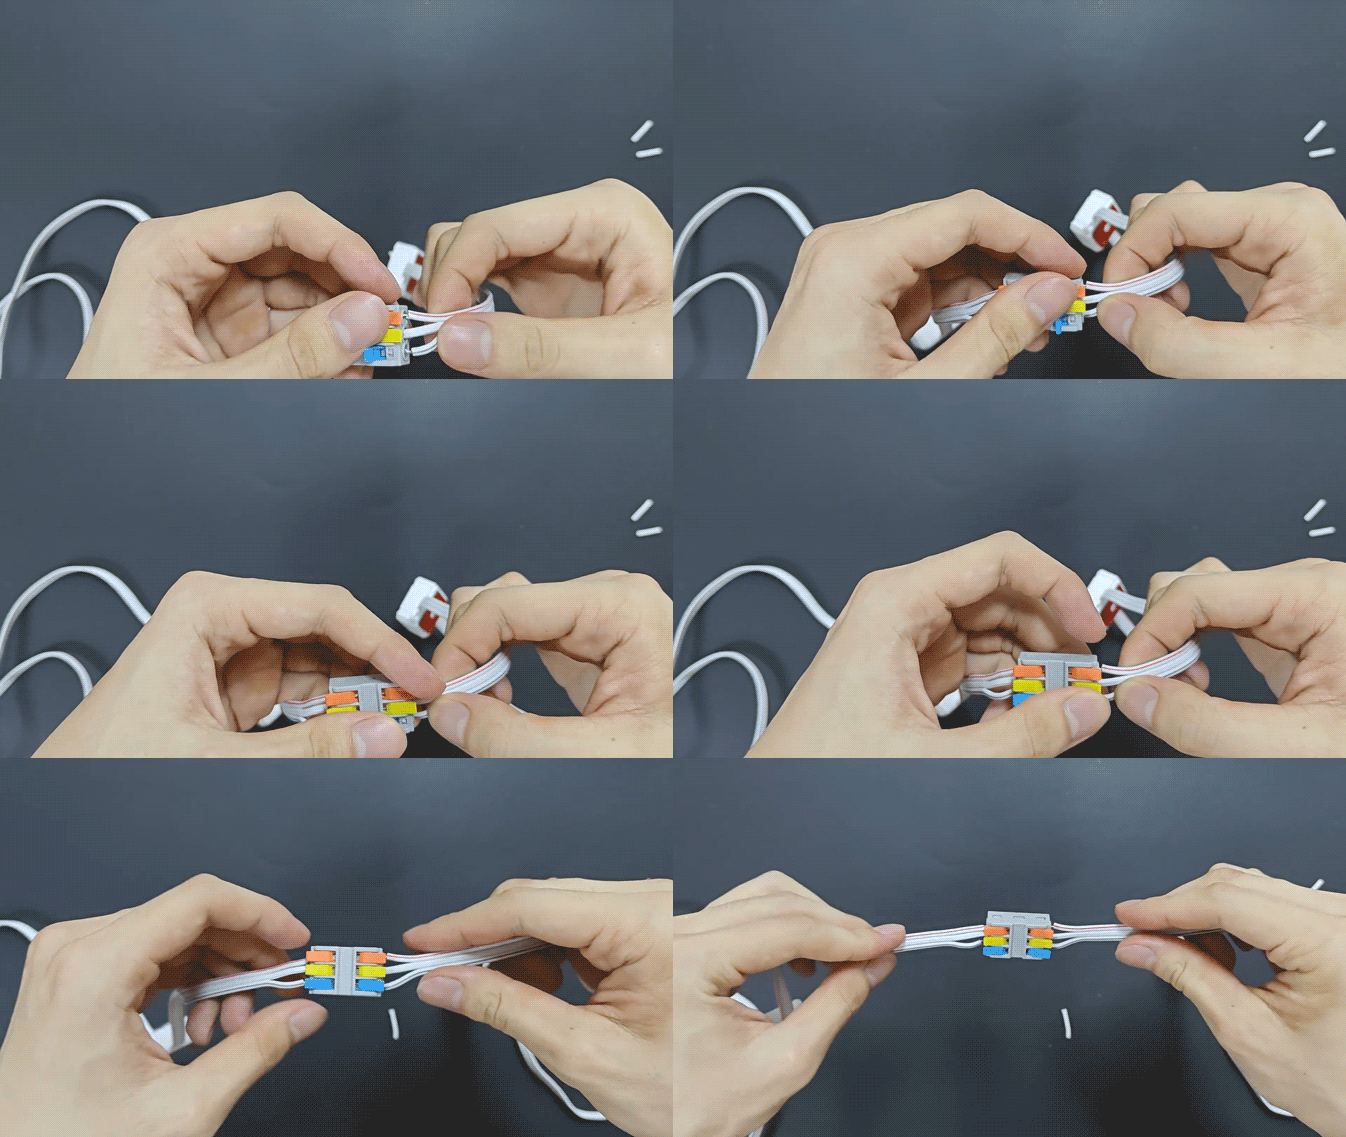
Step 3 – Connect the Wires Use the provided connector to join the wires from both sides. ⚠️ Make sure to match the wire colors correctly. Incorrect connections may cause malfunction or damage.
Step 4 – Open the Waterproof Junction Box Press one side of the box to open it.
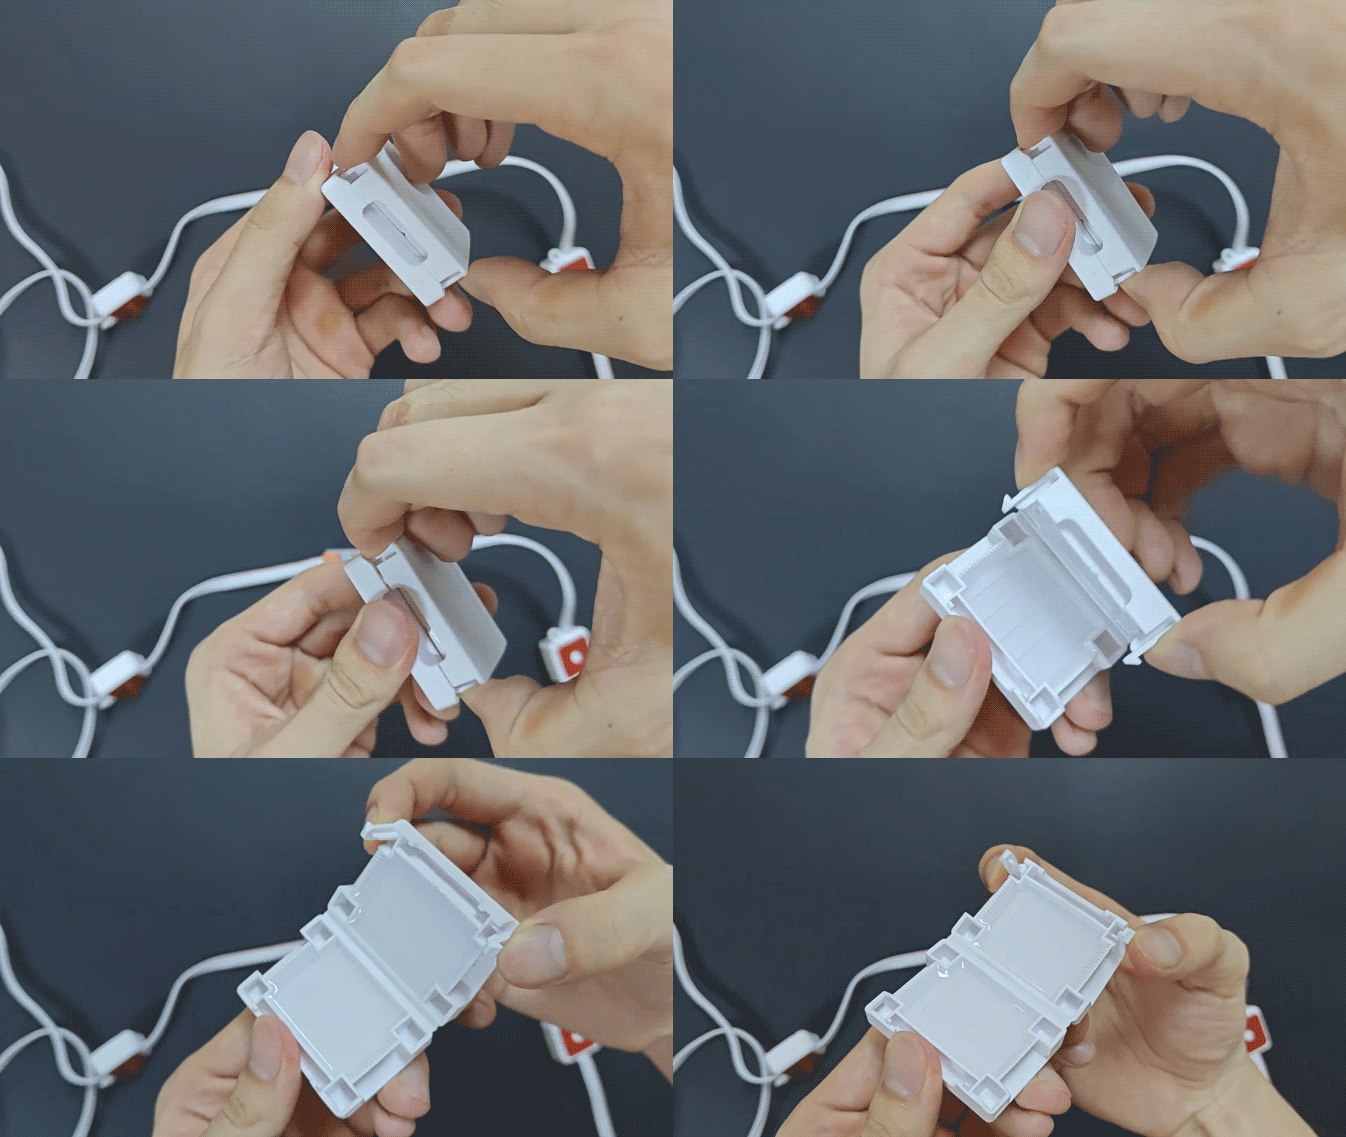
Step 5 – Place the Connector Inside Position the connector in the center of the junction box, then close the box securely.
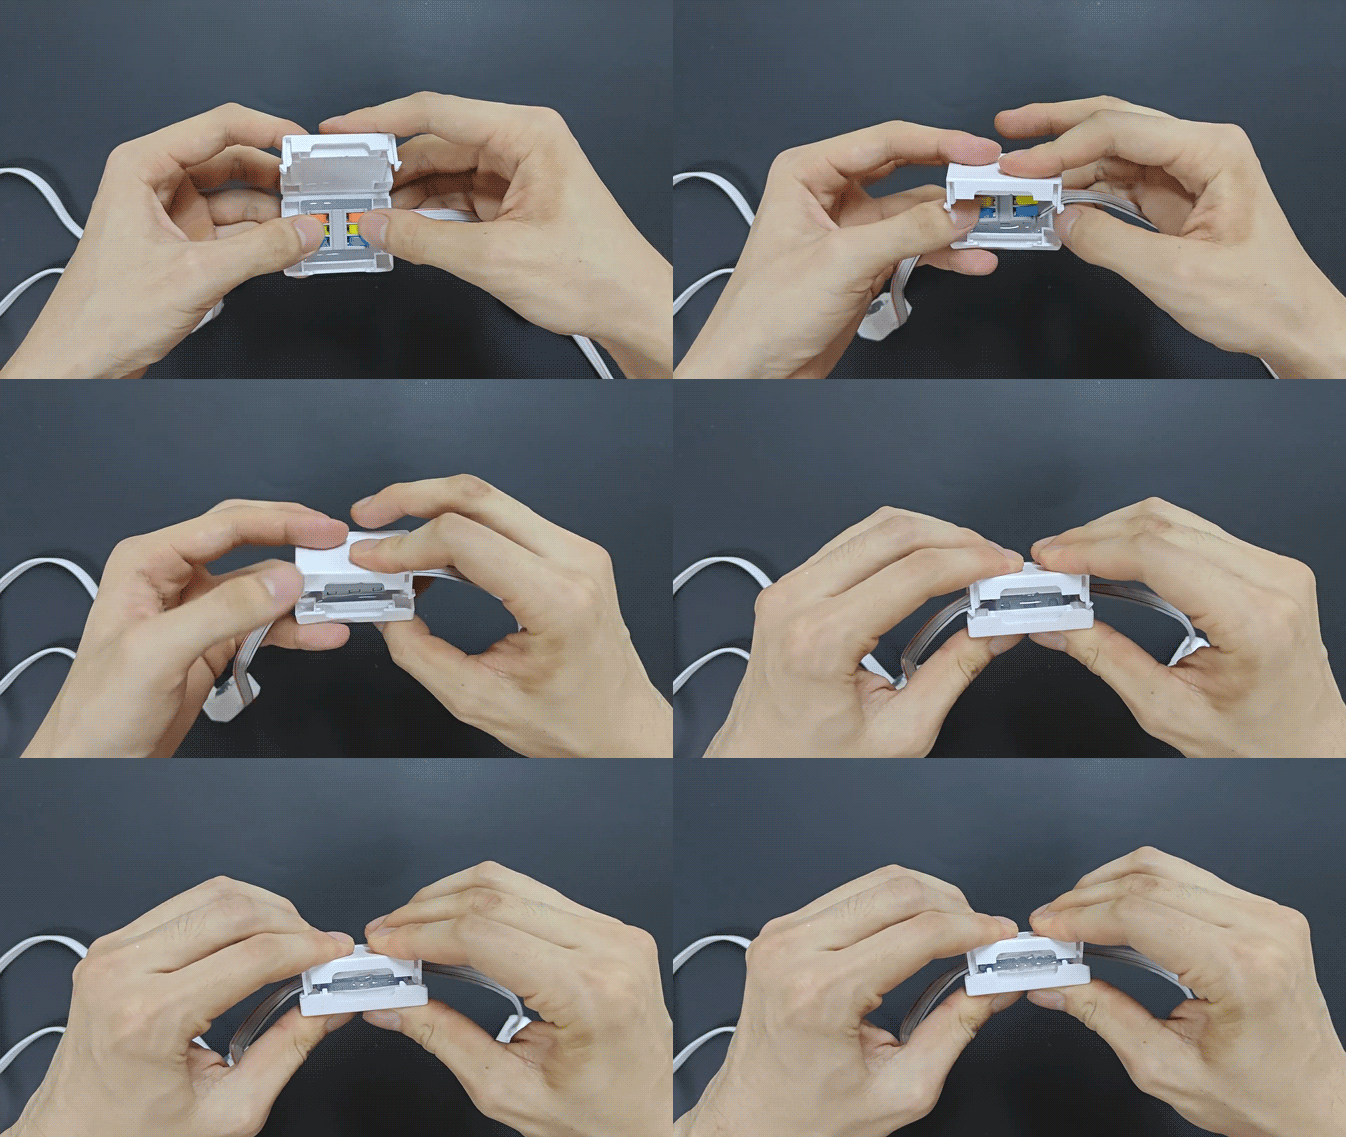
Step 6 – Secure the Box in Place Use the included adhesive backing or wire clips to mount the junction box at the installation site.

Important Warning:
The waterproof junction box is designed for one-time use only. Reusing it may compromise the waterproof seal and lead to failure in outdoor environments.
FAQs
Q1: Can the Waterproof Junction Box be reused?
A1: No. It is designed for single use only. Reusing it may compromise its waterproof performance.
Q2: How do I open the Waterproof Junction Box?
A2: Press firmly on one side of the box to open it.
Note: Do not attempt to open it by pressing both sides at the same time.
Q3: What if lights after the junction box don’t work?
A3: Check if:
-
The wires are connected in the correct order.
-
The connections are tight.
If you find loose or incorrect wiring, replace the junction box with a new one (it cannot be reused).
Q4: Can I cut the lights while powered on?
A4: Technically yes, but for your safety, we strongly recommend turning off the power before cutting.
Updated on 19 Sep 2026
What are your Feelings?
Thanks for your feedback
- Choosing a selection results in a full page refresh.
- Opens in a new window.