- Dual Output vs. Single Output: Unlock Greater Flexibility for Your Permanent Outdoor Lights
- Why ASAHOM Permanent Outdoor Light Installations Over 200ft Need Extra Power Injection?
- The Simple, Secure Seal: Why ASAHOM's Waterproof Connectors Are a Game-Changer
- Unleash Your Creativity: How ASAHOM's Palette & Effect Combo Redefines Smart Lighting
- Why Your Outdoor Lights Stay Connected: The Truth About WiFi & Why ASAHOM Uses 2.4GHz
- Beyond Simple Splitting: How the ASAHOM T-Splitter Redefines Smart Lighting Control
- Redefine Your Night: The Power of Zone Control with ASAHOM
Quick Start Guide
Before Installation Notes
Before use, please watch the full demo video (model S108D shown as example) to get familiar with the product.
Accessory support may vary by model—check the Accessories section to confirm compatibility.
Step 1 – Test Before Installation

What to do:
- Connect all string light sections in sequence
- Plug in the power adapter
- Check that all lights are working properly
Ensure all lights are connected before powering on. Otherwise, the lights may not illuminate.
If some lights do not turn on, try setting the correct number of lights in the App first.
If your setup includes more than 144 LEDs, please refer to the Power Injection T-Connector section for proper connection guidelines.
Step 2 – Prepare the Mounting Surface

What to do:
Wipe the mounting surface with a dry cloth or alcohol wipe
Ensure the surface is clean and completely dry
Dirty or wet surfaces may reduce adhesive strength.
Step 3 – Mount the Lights
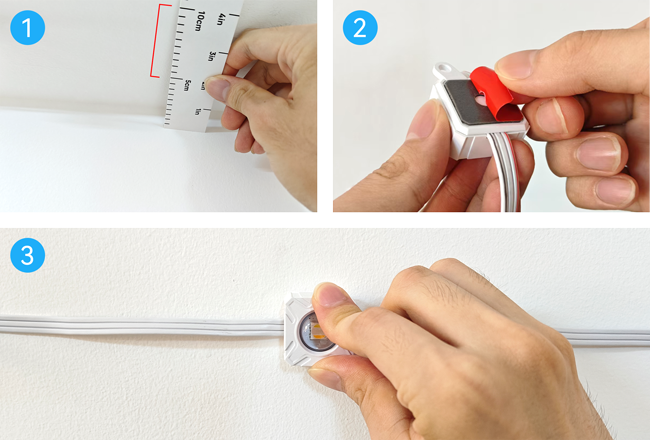
What to do:
- Determine the installation position
- Peel off the adhesive backing
- Firmly press each light base for at least 8 seconds
Recommended mounting distance: 5–10 cm away from the wall
Improper spacing may affect lighting angle and appearance.
Step 4 – Secure with Screws

What to do:
- Each light base has a pre-drilled hole for screw mounting
- Use screws to fix each light directly to the mounting surface
- Strongly recommended for outdoor use
Provides long-term stability and durability.
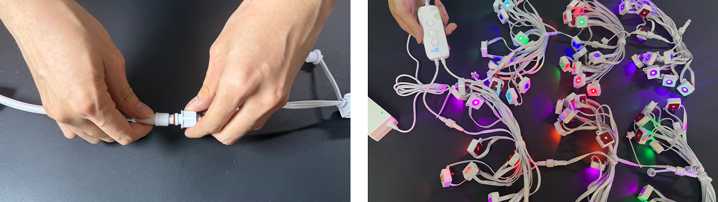
Step 5 – Connect Waterproof Plugs
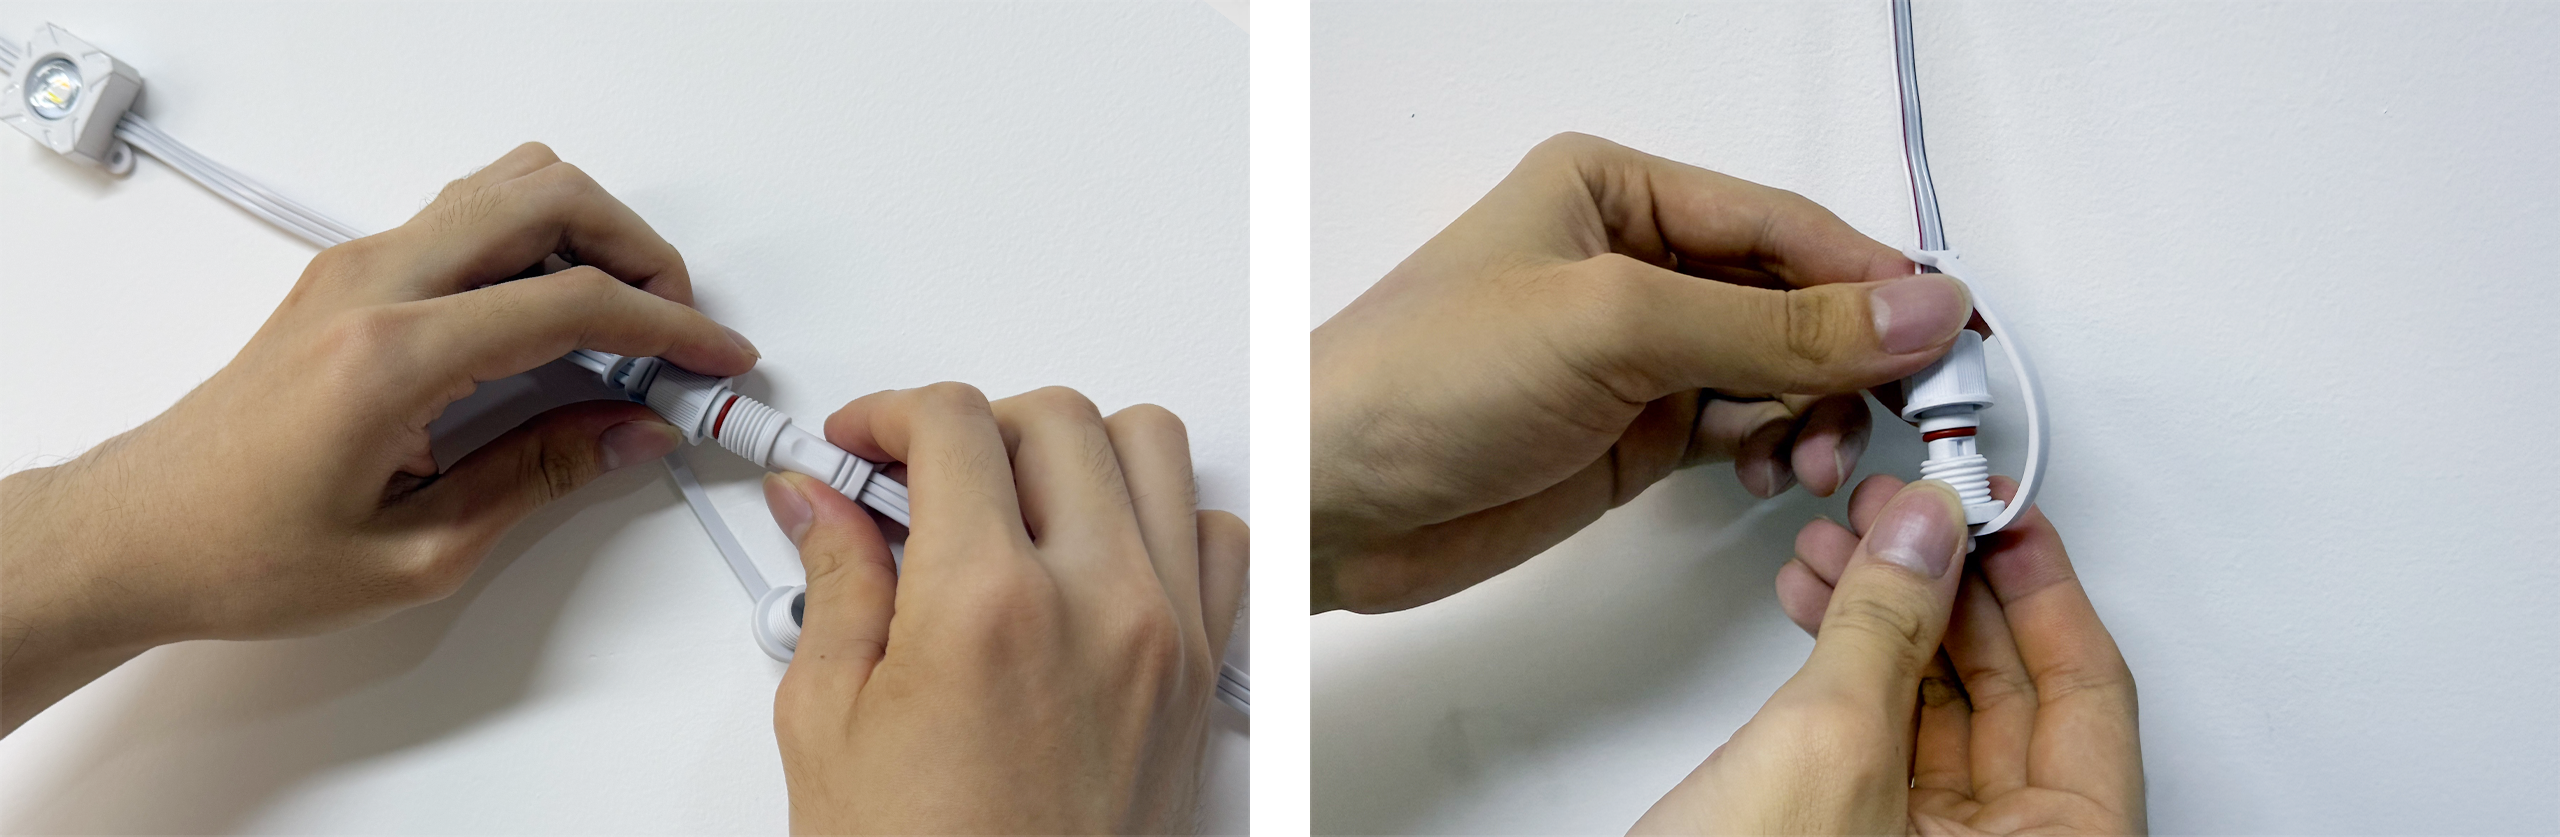
What to do:
- Insert the red washer before connecting
- Align plugs and tighten waterproof caps securely
- If you have extra lights at the end, cut them off and use the End Cap to seal the end
Make sure the red washer is in place.
- Use the End Cap to keep the connection waterproof. For details, refer to the End Cap section.
Step 6 – Power On & Pair with ASAHOM App

What to do:
- Plug in the power adapter
- Download and open the ASAHOM App
- Ensure your phone is connected to 2.4GHz WiFi and Bluetooth is on
- Keep your phone within 5 meters of the control box
- Follow the in-app instructions to pair
The control box's blue light flashing indicates pairing mode.Need help on this step? Check out our detailed network setup guide!
Final Reminder
- Set the correct number of lights in the App to ensure effects work properly
- Refer to the full knowledge base for advanced features and troubleshooting
FAQs
A1: Why doesn't the string light up after plugging in?
Q1: Each light string section must be connected before plugging in, otherwise it may not light up.
A2: Why does the string light fall off during installation?
Q2: Clean the wall surface with a dry cloth or alcohol wipe before installation;
In addition to adhesive, it's recommended to secure with screw clips, especially at corners and connectors.
A3: What if lights do not respond after installation?
Q3: First check if all connectors are tightened correctly and waterproof sealed;
Try unplugging and plugging back power. When the control box’s blue light blinks, reconfigure Wi‑Fi pairing.
Updated on 18 May 2026
What are your Feelings?
Thanks for your feedback
- Choosing a selection results in a full page refresh.
- Opens in a new window.